 Tweet
Tweet
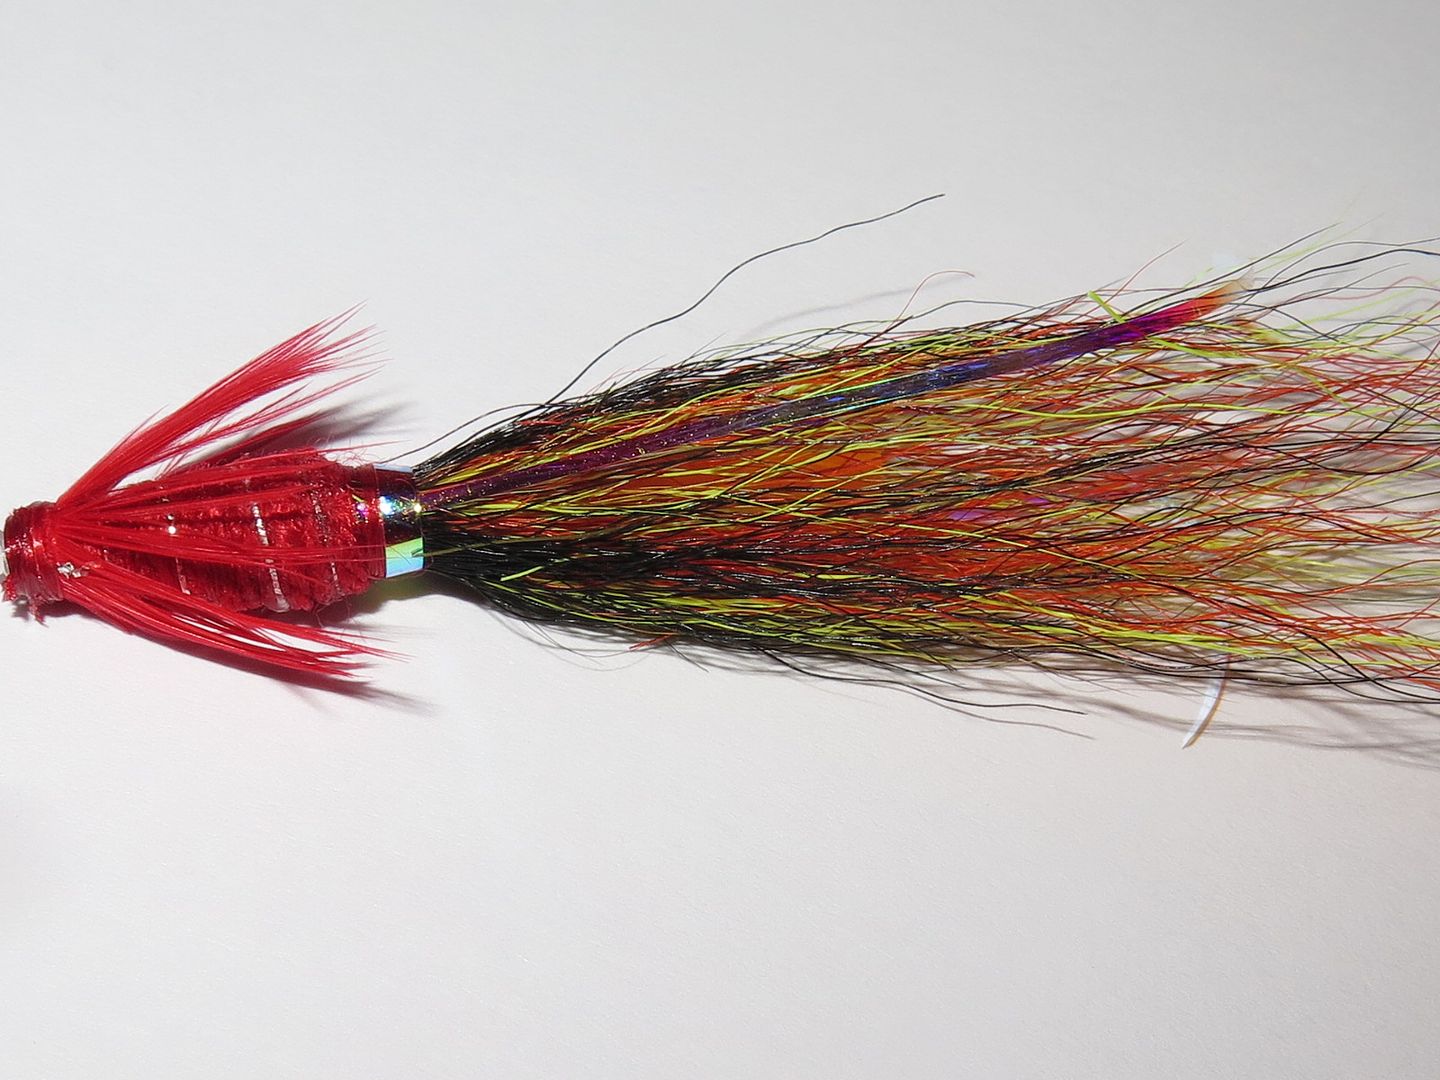
The Willie Gunn Snaelda is a real favourite of mine for salmon fishing in spring. Tied up on copper tubes of 1"+ affords the luxury of being able to bury a large chunk of the bare tube in the tail of the fly and end up with a very short bodied fly that is extremely heavy. The banker is that the pattern really does work and work very well indeed.
Tying Materials
Tube: Veniard copper Slipstream
Thread: Red
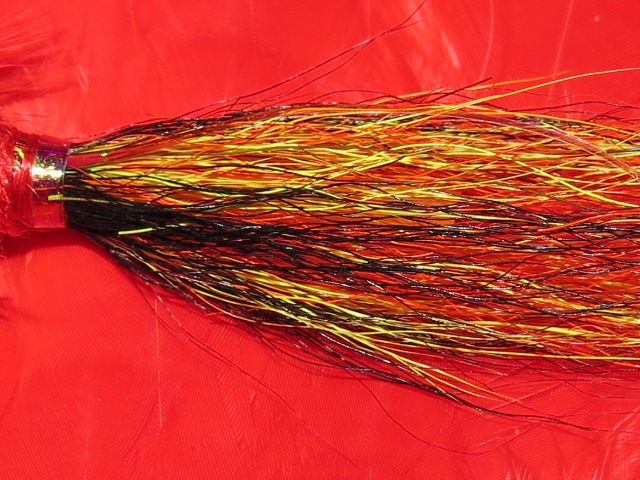
Tail: Blended orange, yellow and black bucktail fibres with a length of medium Opal Mirage overlaid down each side
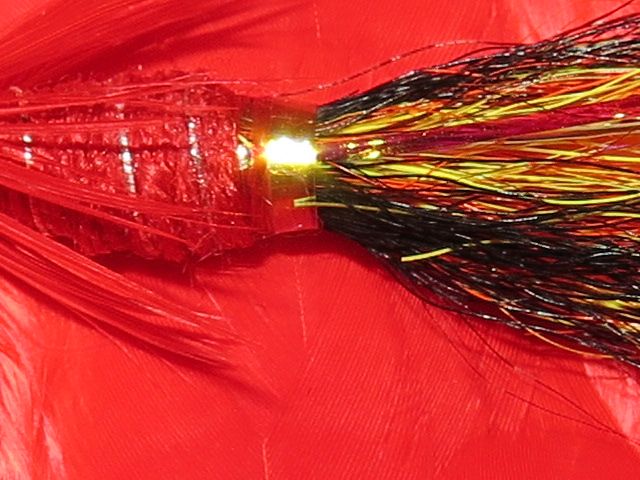
Tag: Large Opal Mirage
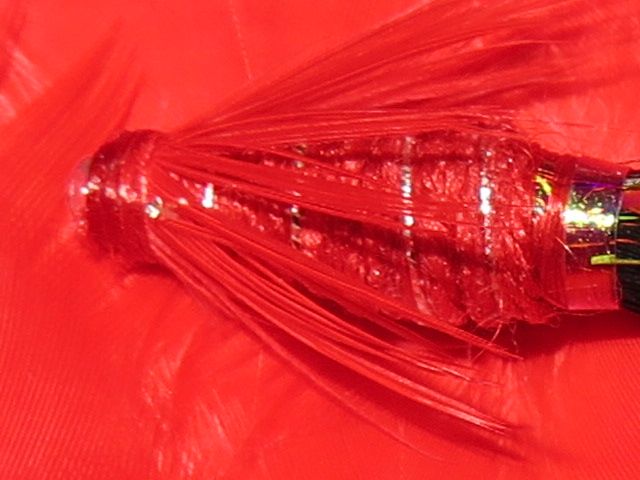
Body: Red granny wool tied in carrot shaped profile
Rib: Medium French Oval
Hackle: Red dyed hen saddle
Tying Method
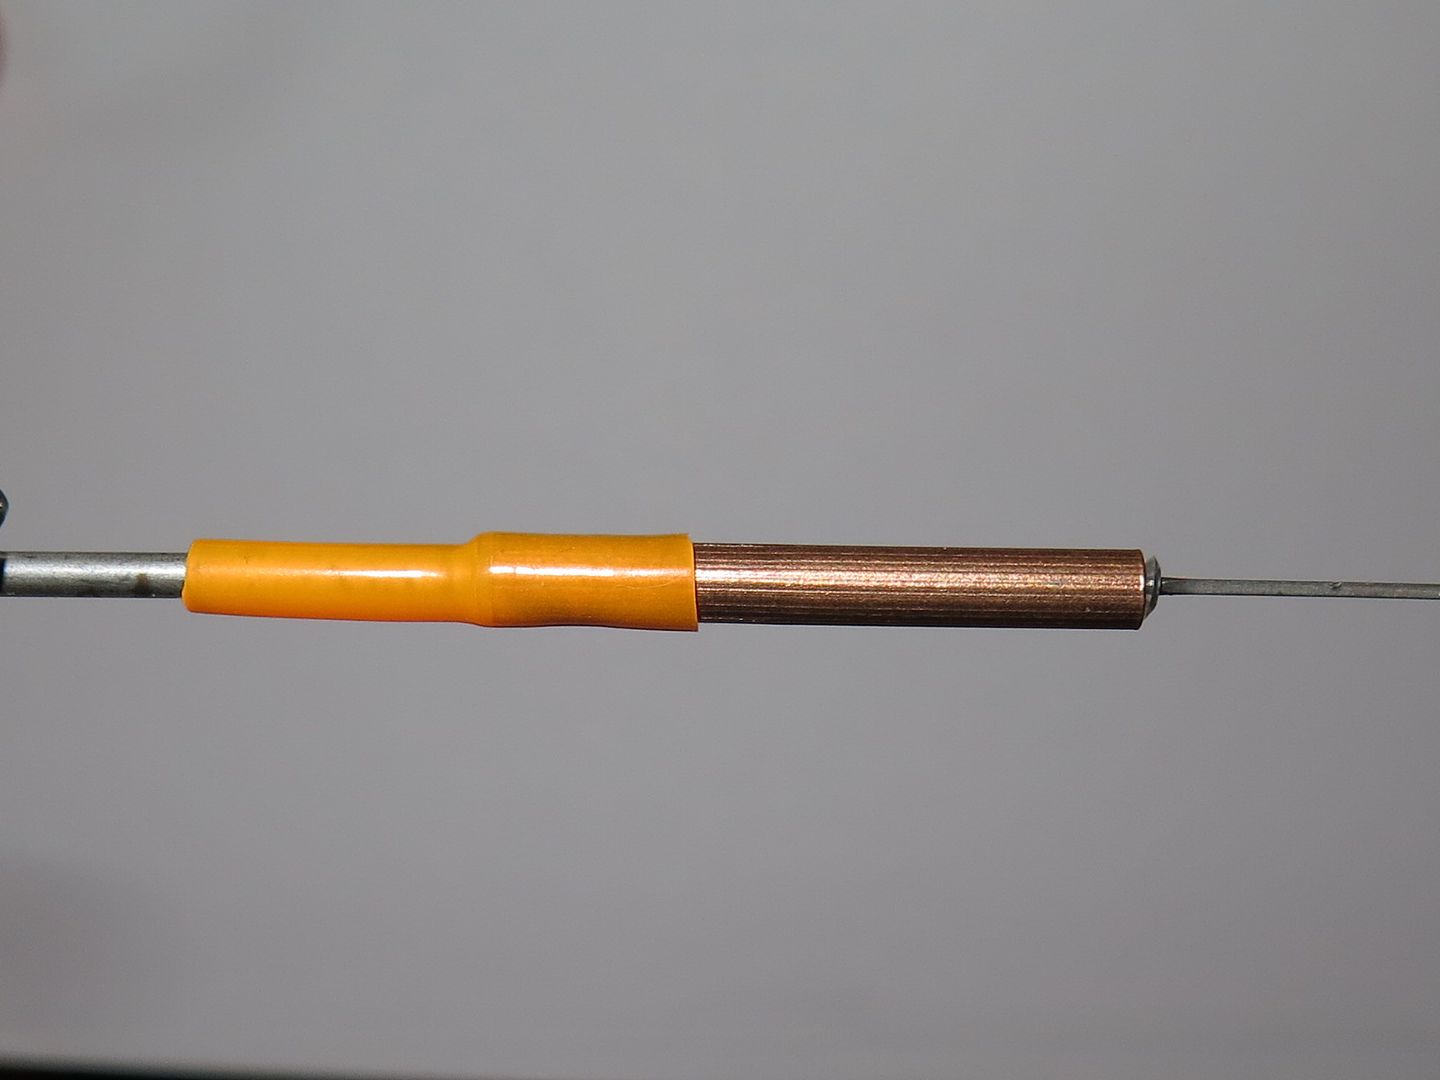
Step 1:Secure the tube with junction tube attached in the vice collet
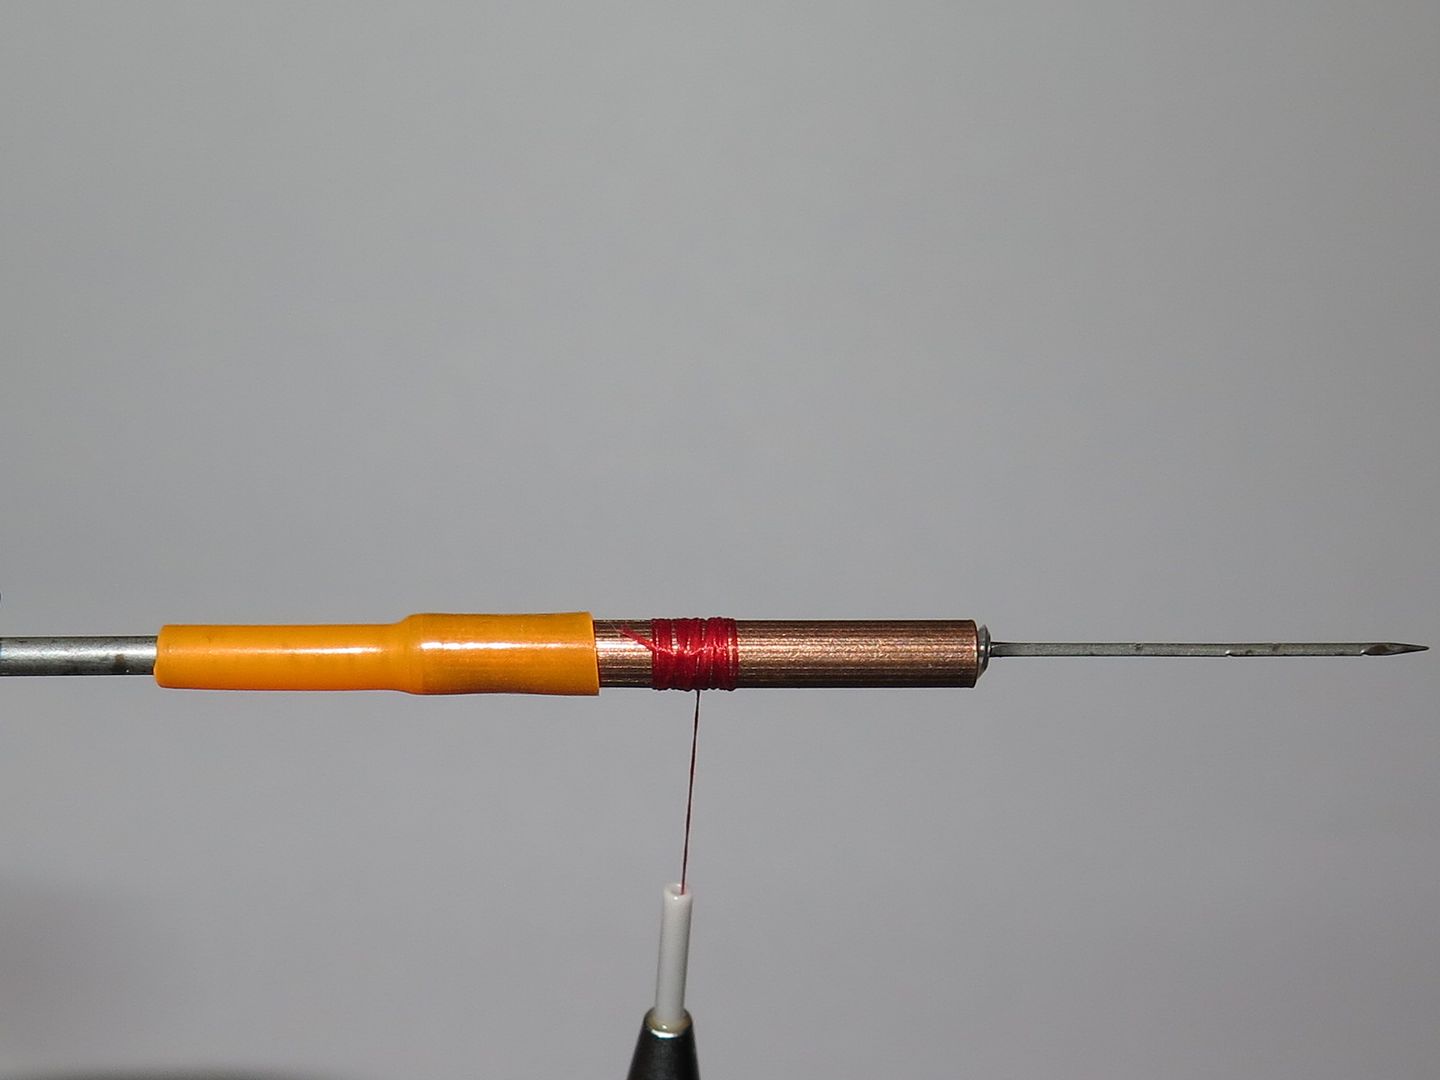
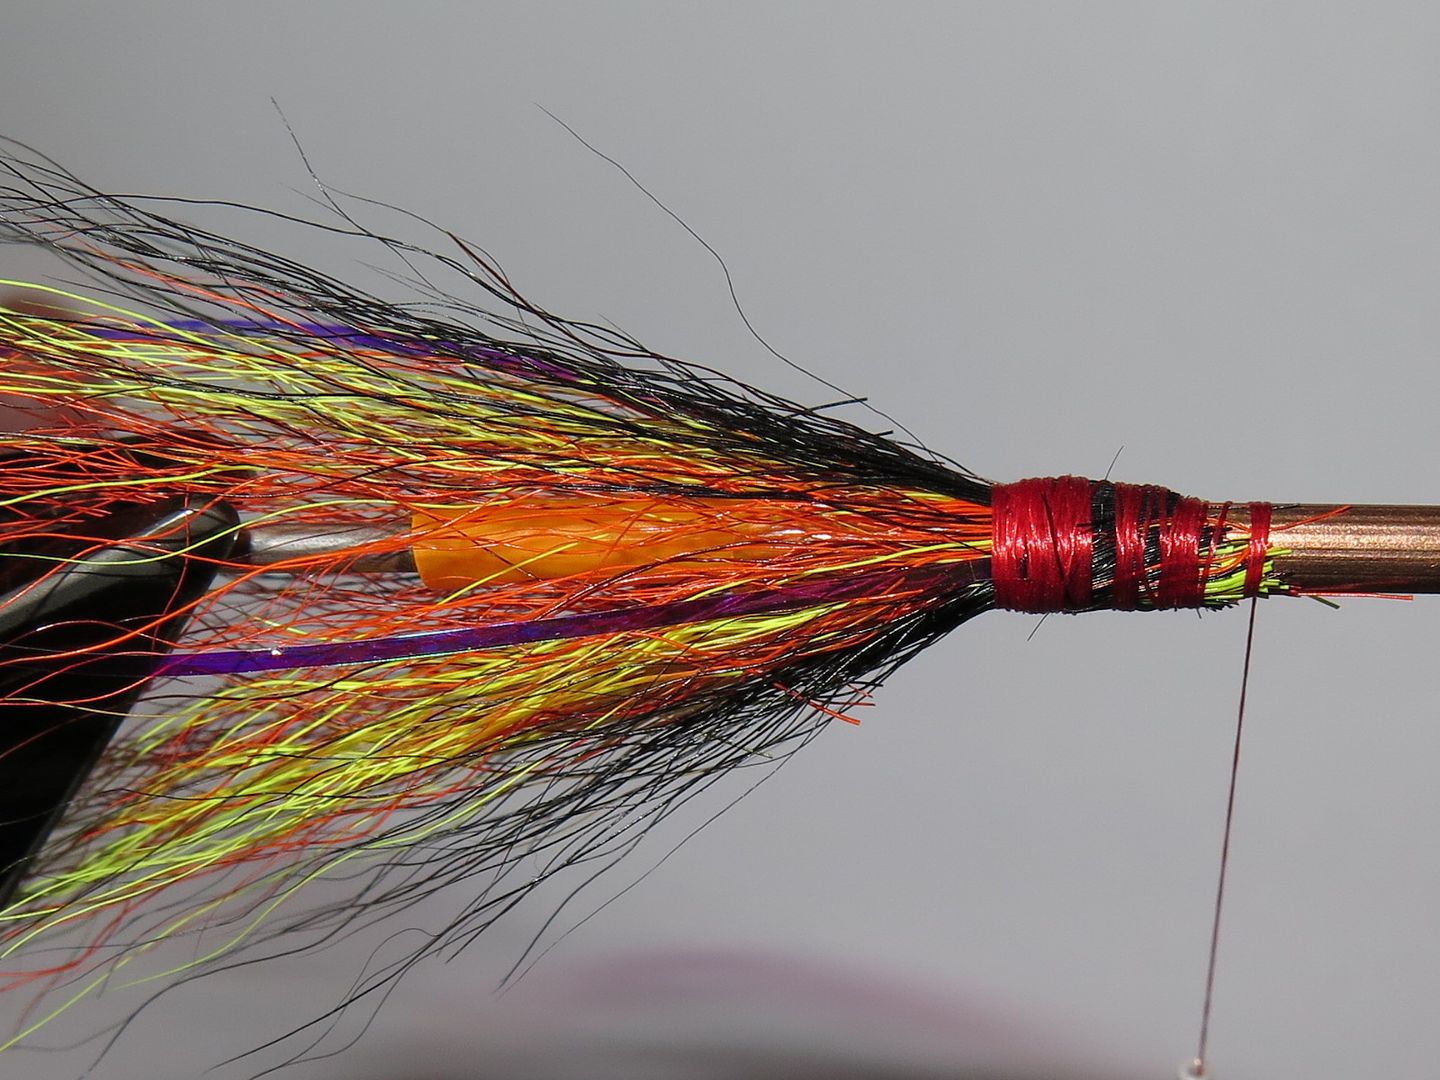
Step 2: Attach red thread and wind in touching turns
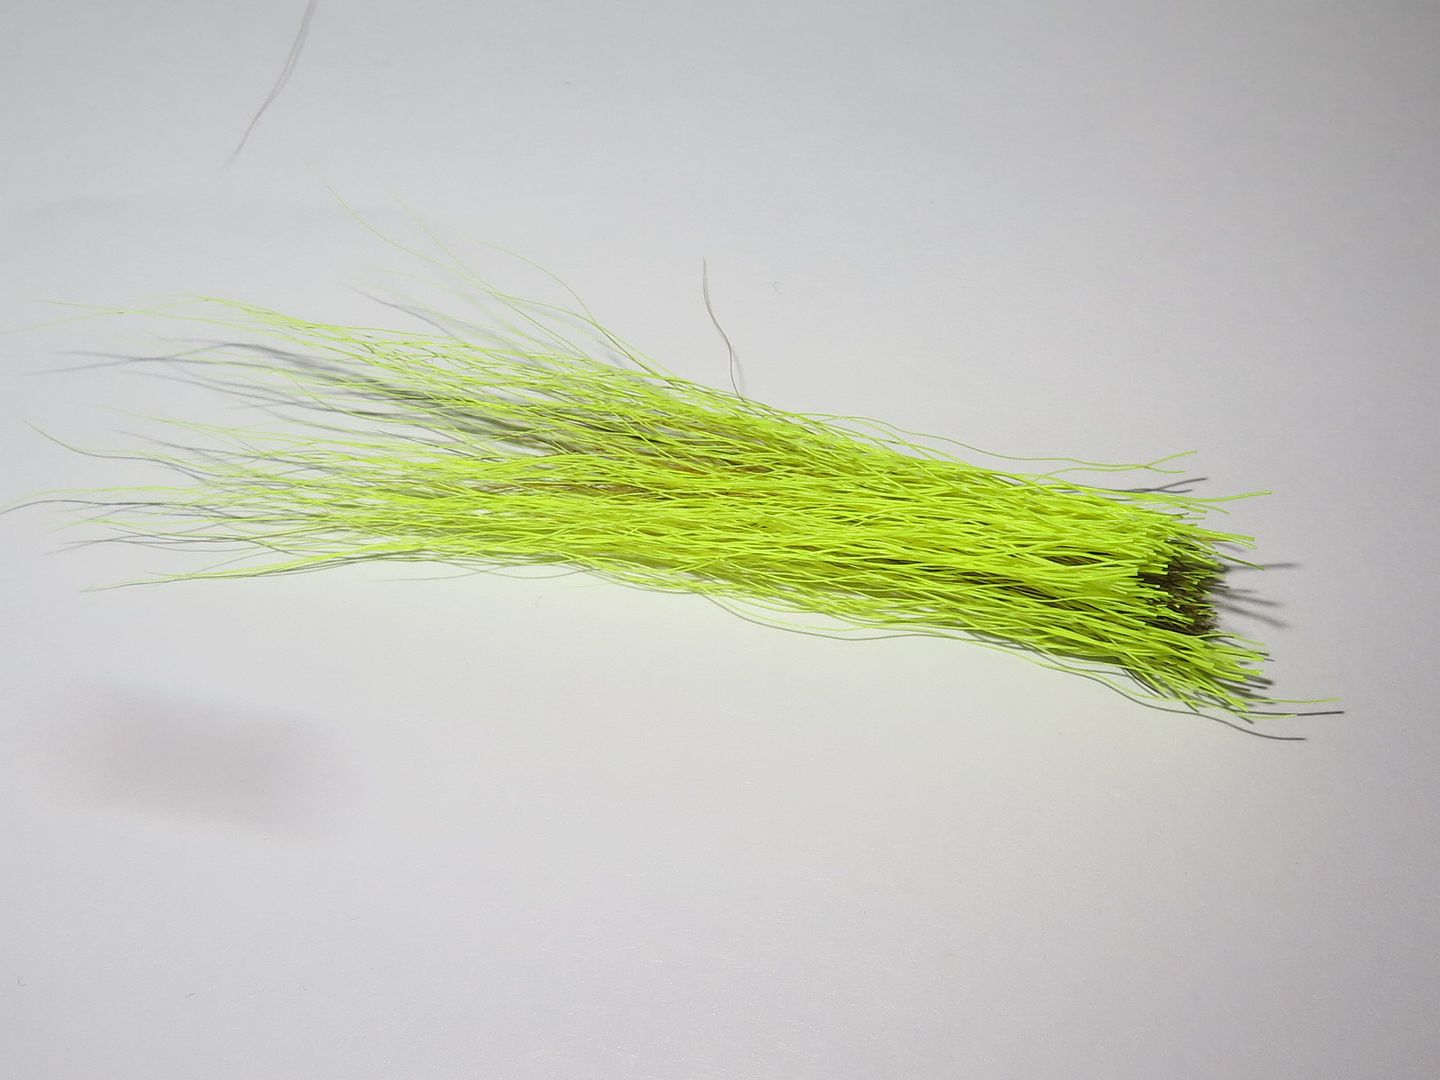
Step 3: Cut a bunch of yellow dyed bucktail removing the underhair from near the base
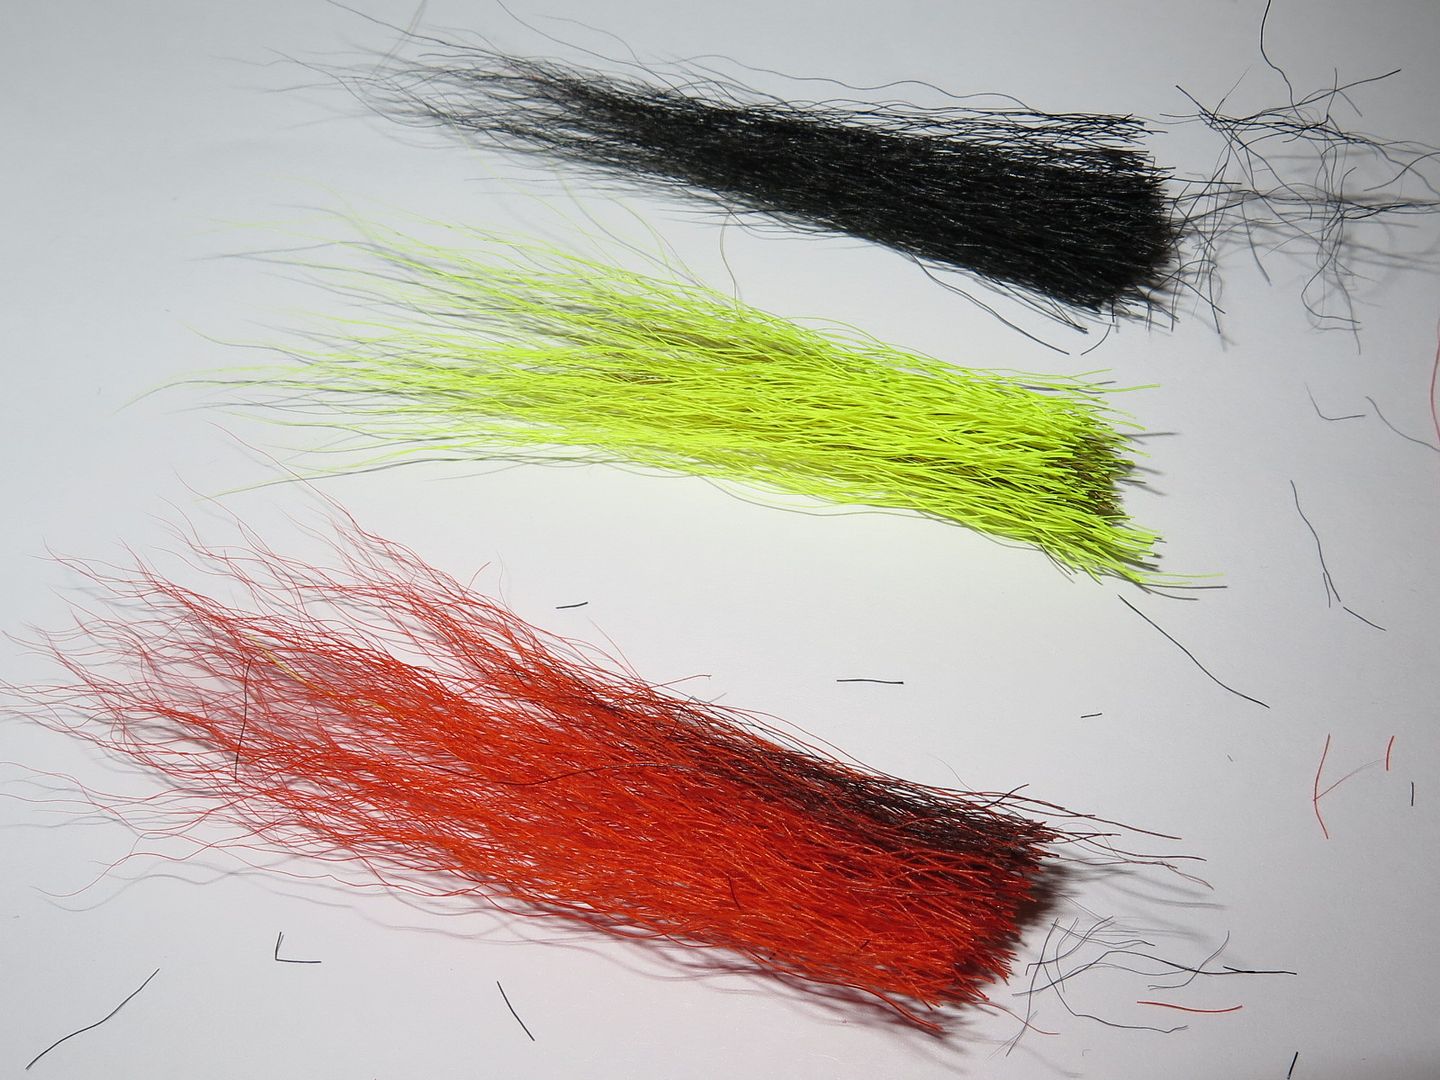
Step 4: Repeat the process with red and black bucktail
Step 5: Blend the yellow and orange bucktail by rolling around in your fingers. It is important to ensure that the hairs are fully fixed. Tie in slim bunches around the tube.
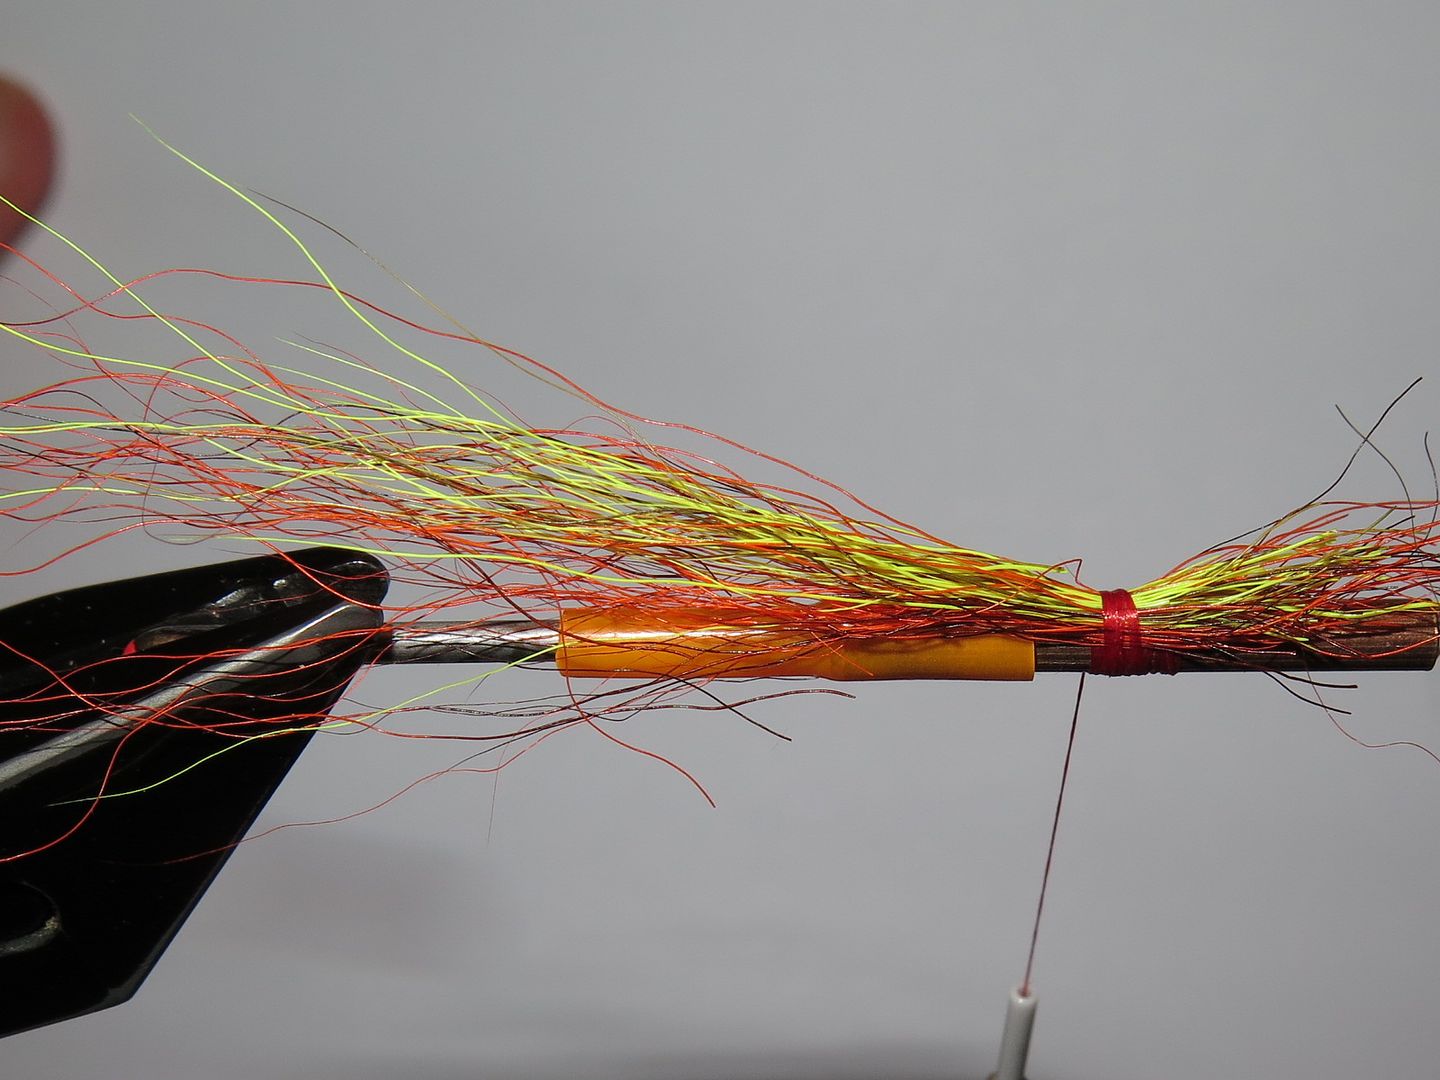
Step 6: As you make the first couple of wraps of thread allow the bucktail to roll around the tube before securing. This ensures that the tail completely surrounds the tube evenly.
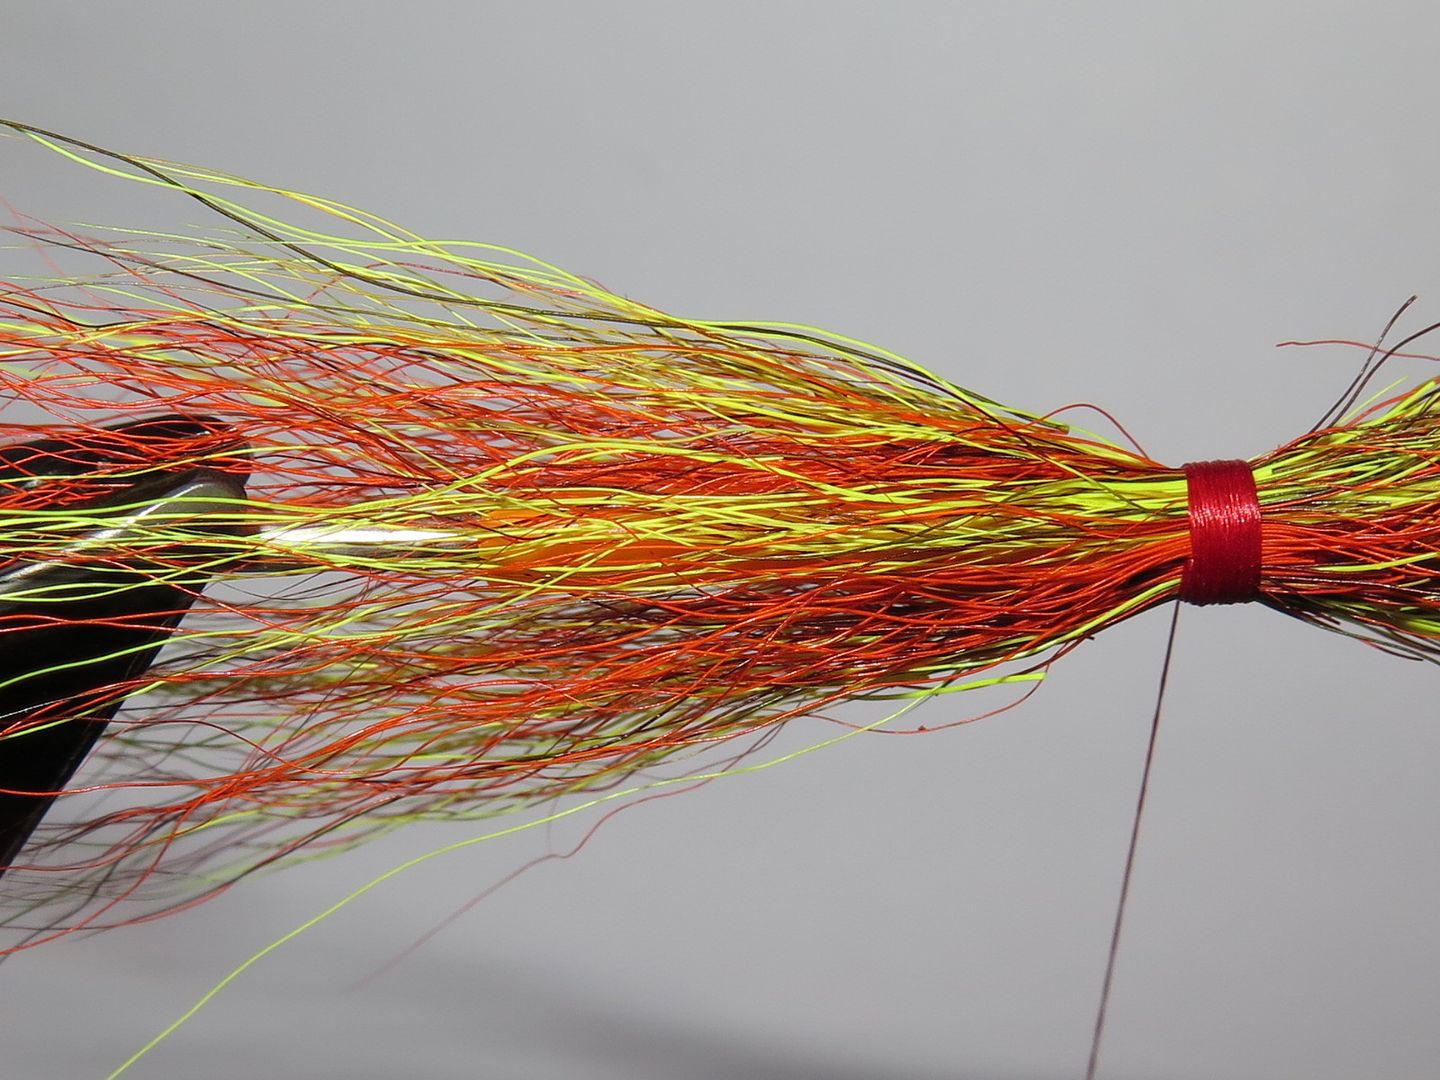
Step 7: You may in step 6 decide to include the black bucktail. Personally I prefer to tie it in separately and shorter than the orange and yellow. this also allows you to finely tune jut how dark you blend the tail of the pattern.
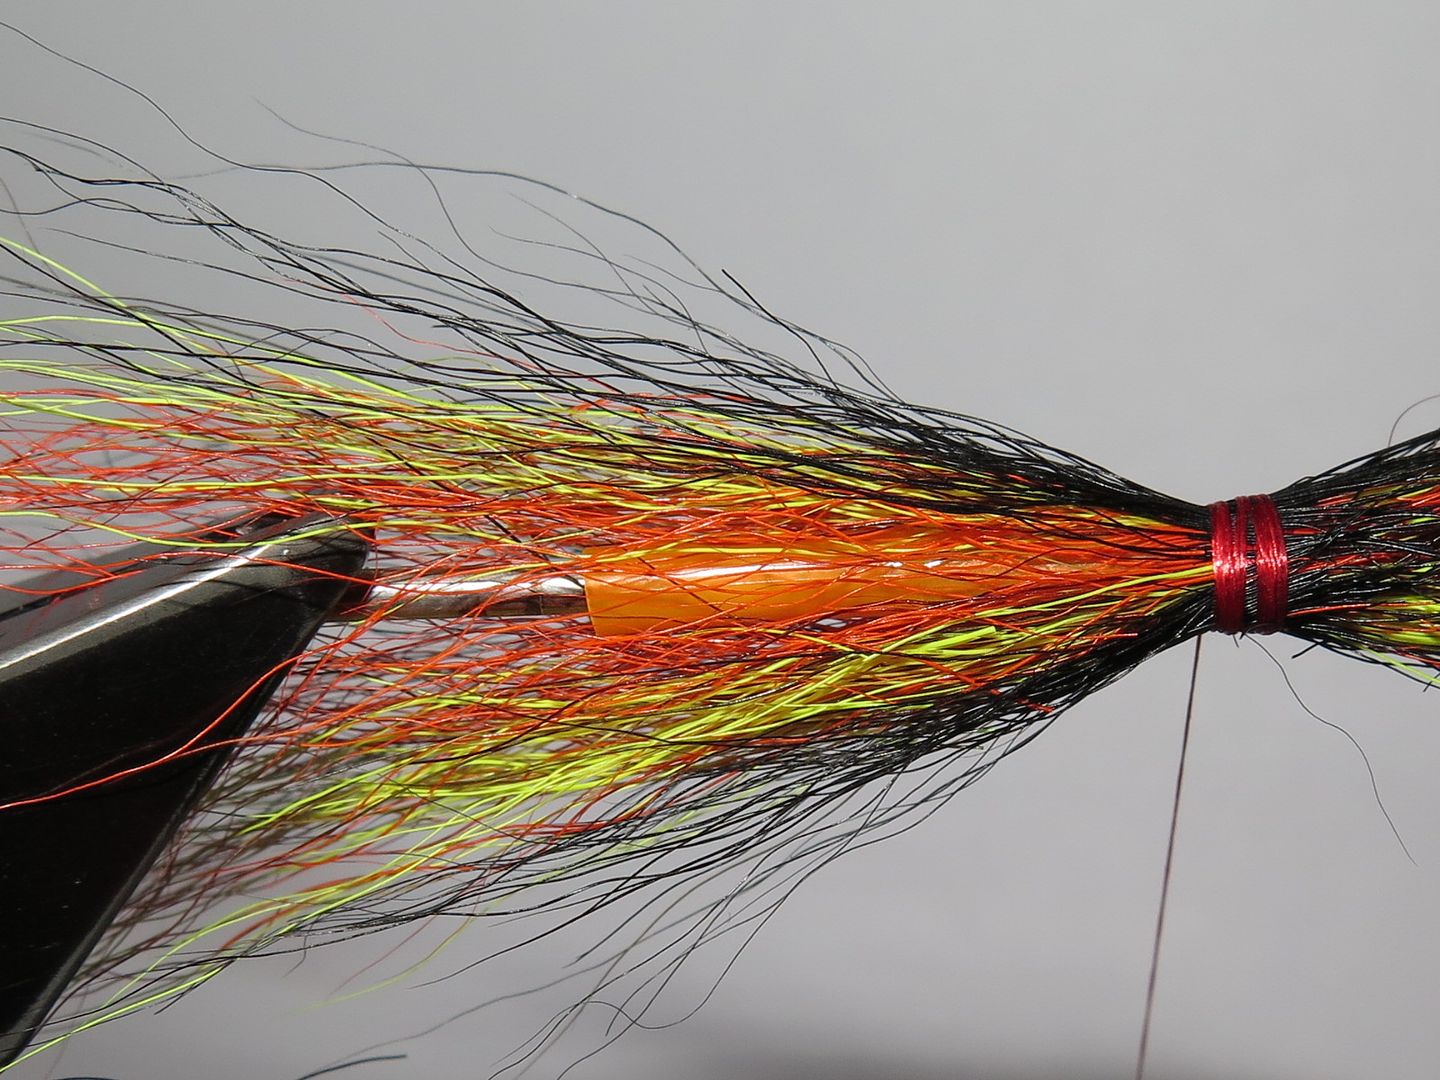
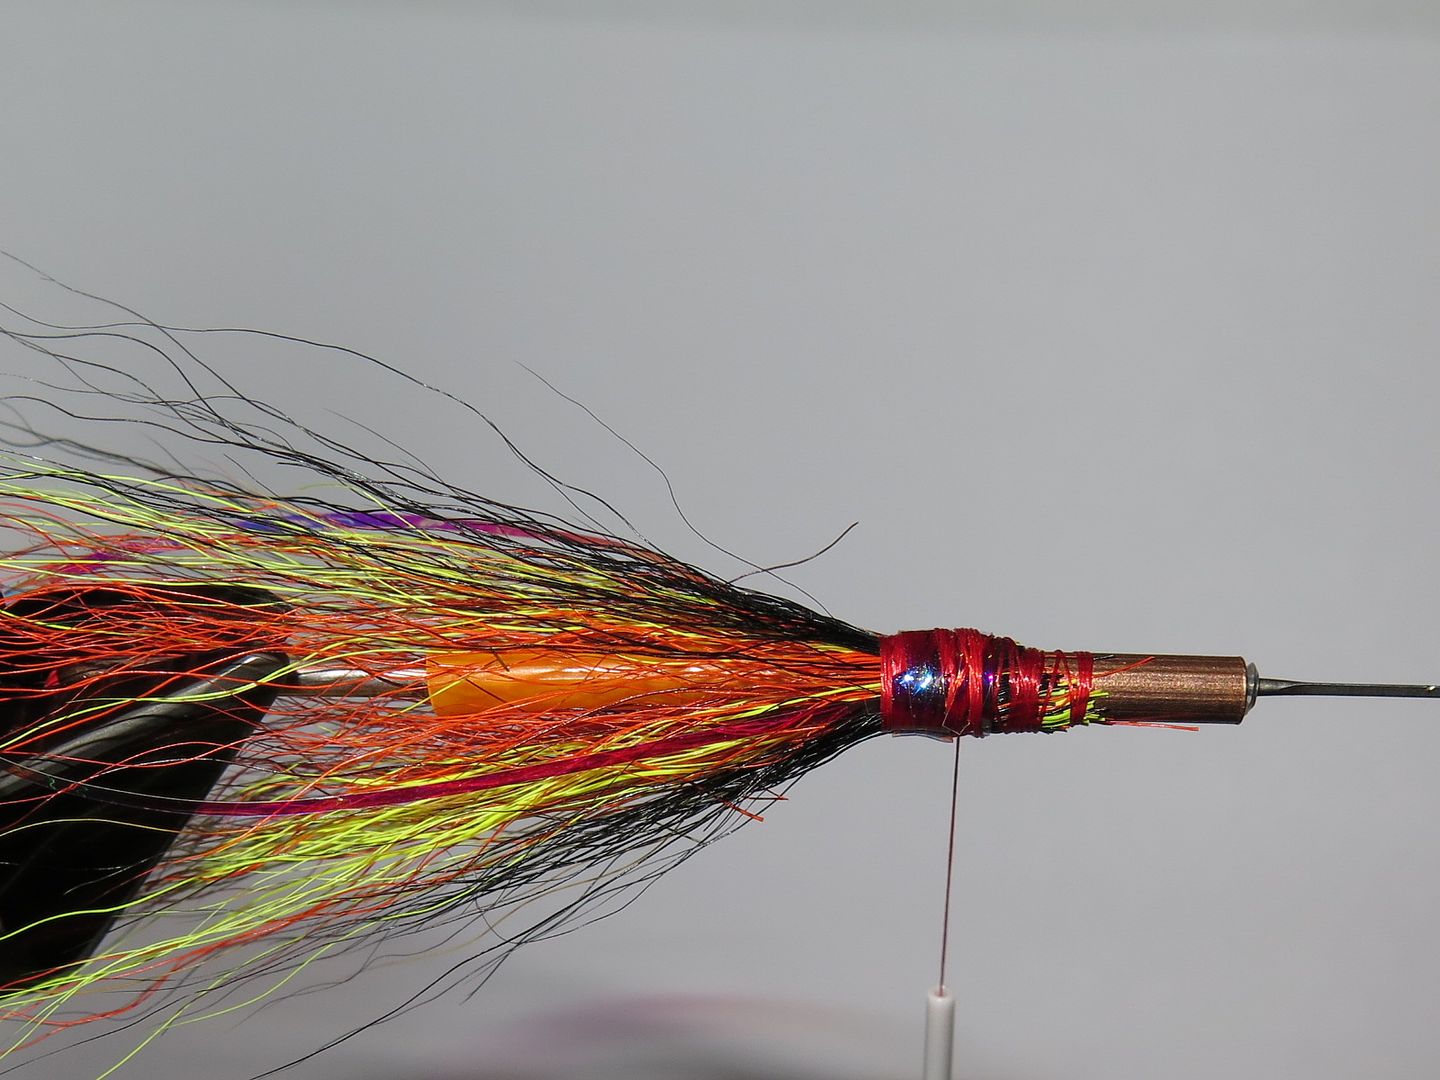
Step 8: Tie in Opal Mirage medium for that little bit of blingy thing.
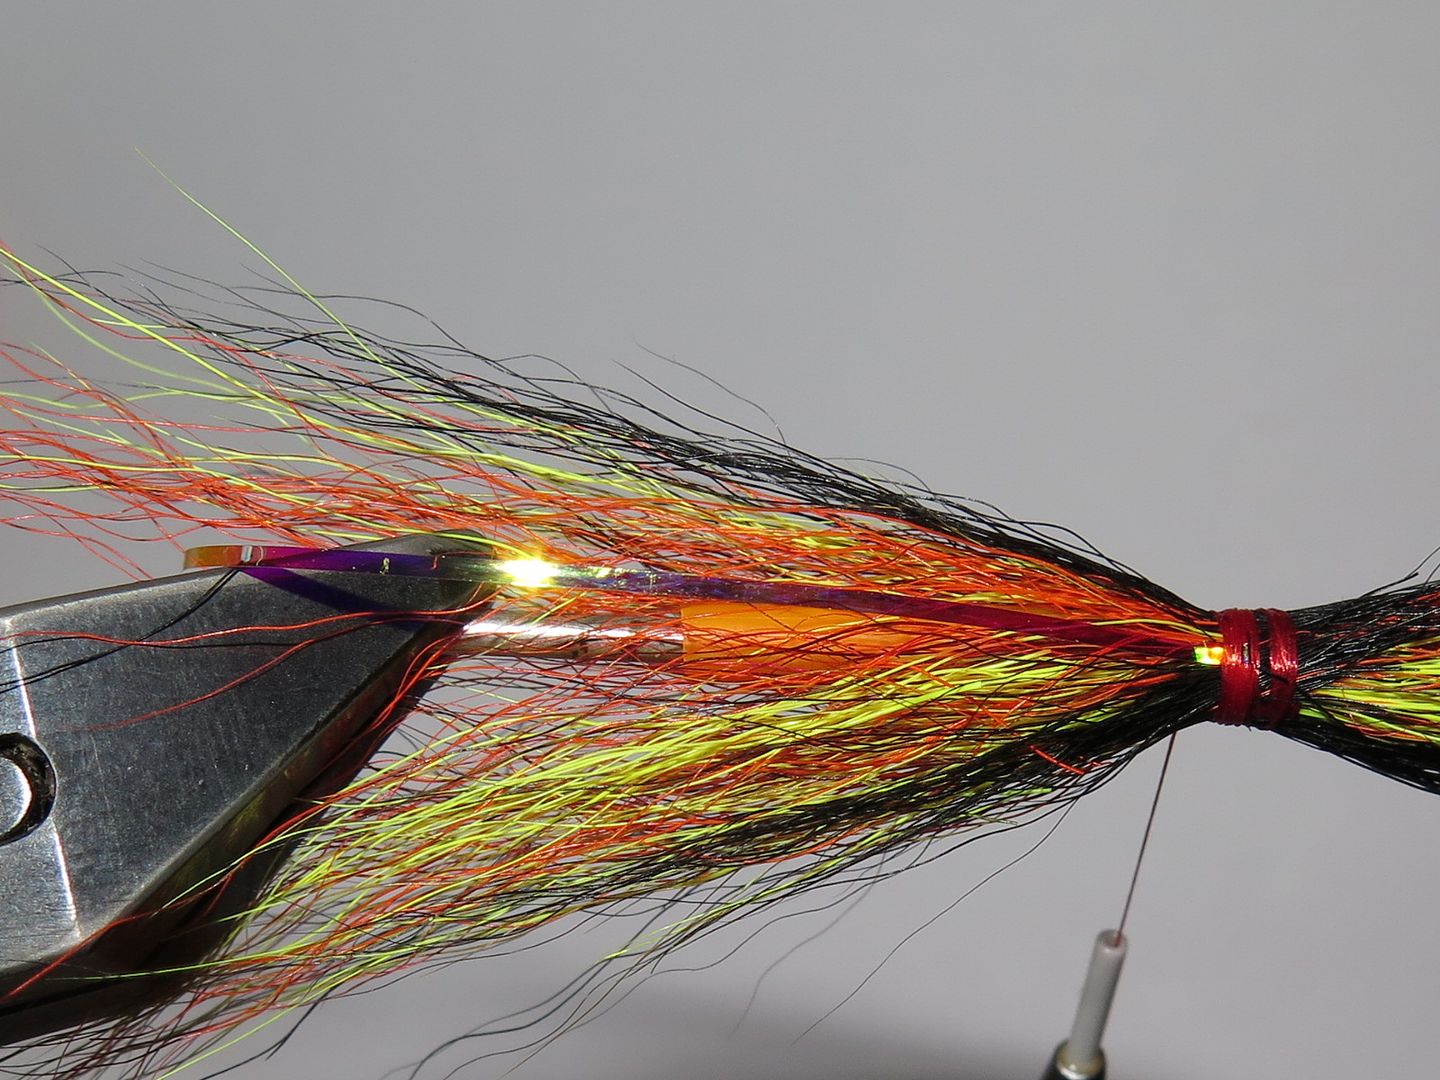
Step 9: Trim the waste ends of the bucktail which should be done to shape to start to introduce the profile of the body.
Step 10: Tie in a length of large Opal Mirage and wind to form tag.
Step 11: Tie in a length of silver medium French Oval tinsel and wind back to tag.
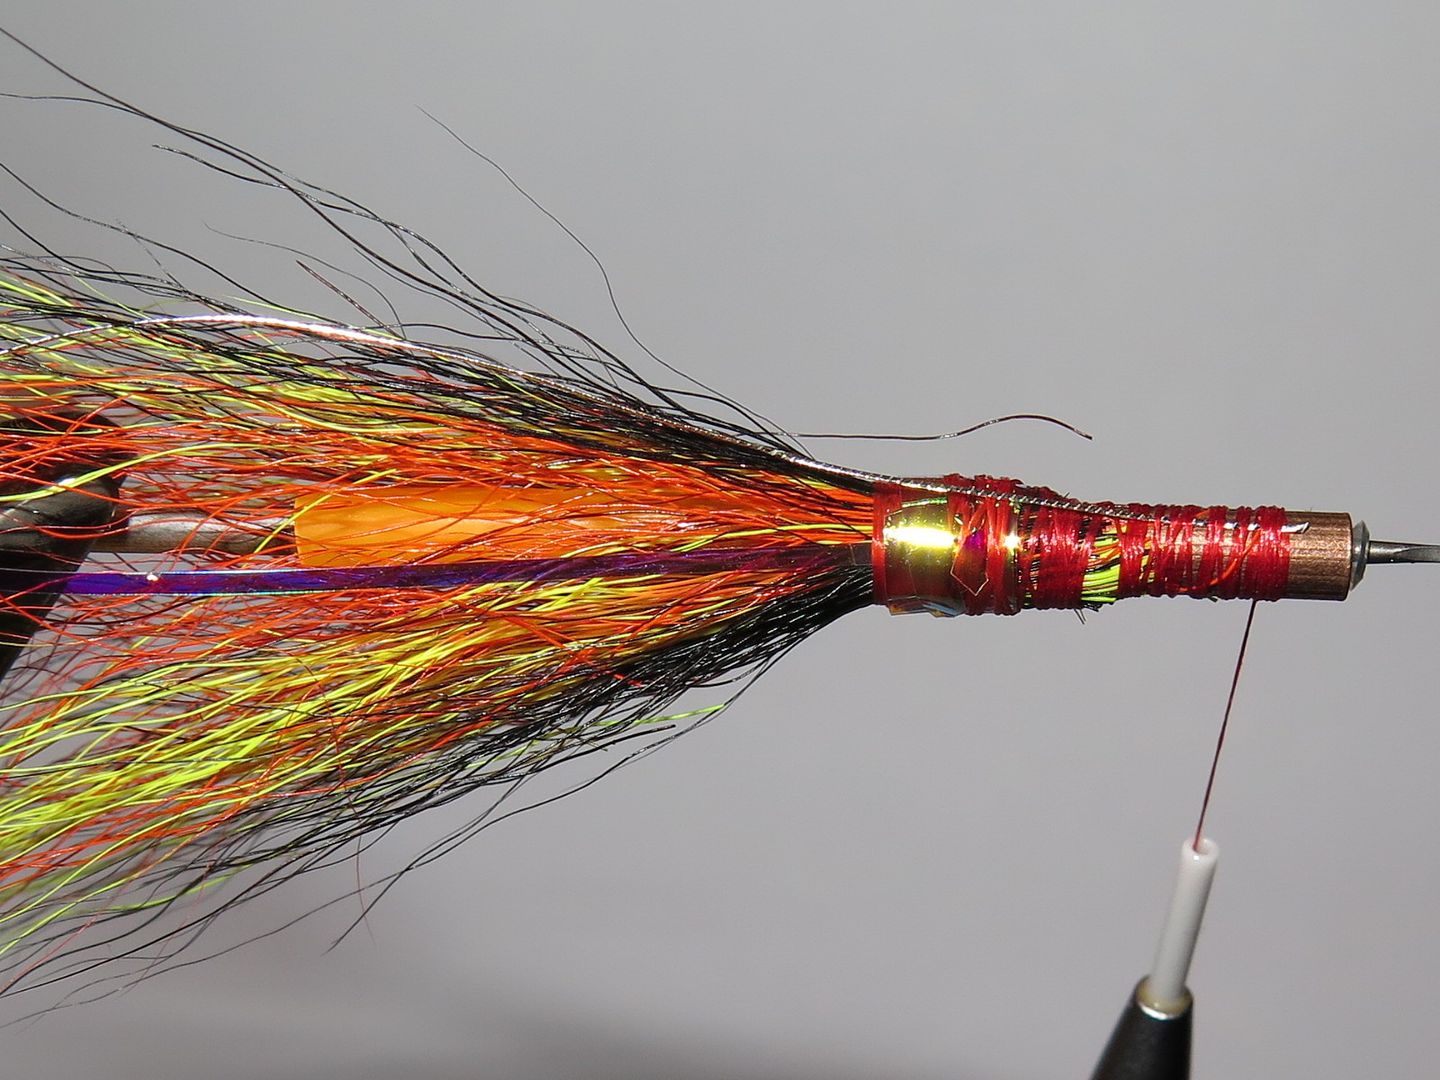
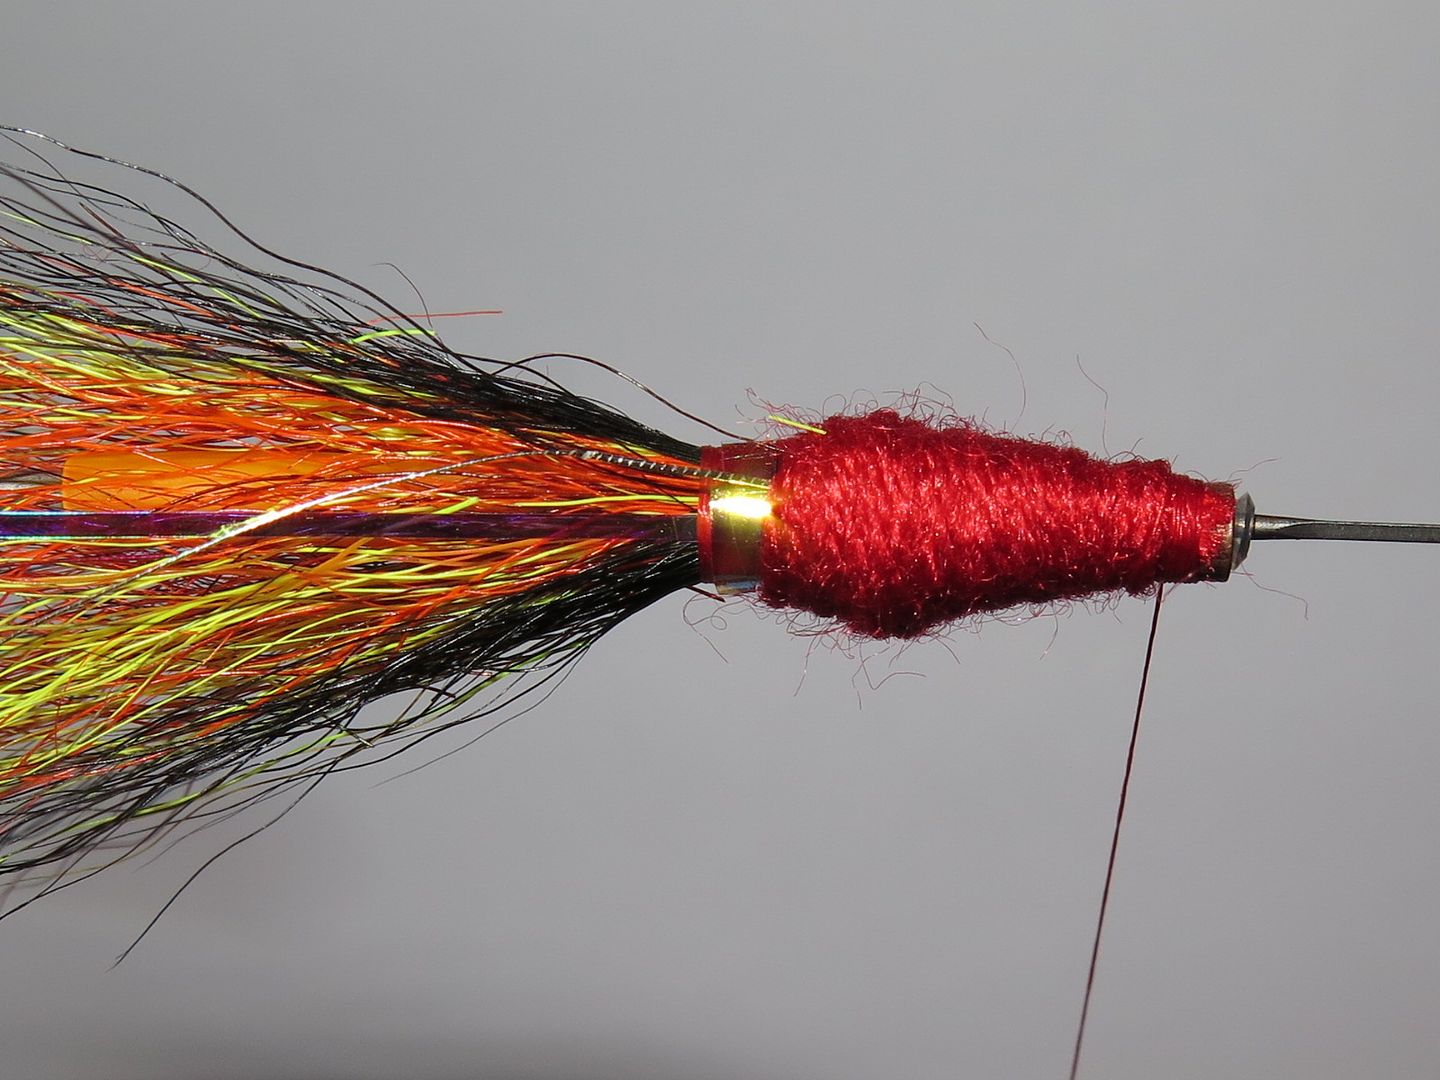
Step 12: Tie in a length of red granny wool.
Step 13: Wind wool to carrot profile.
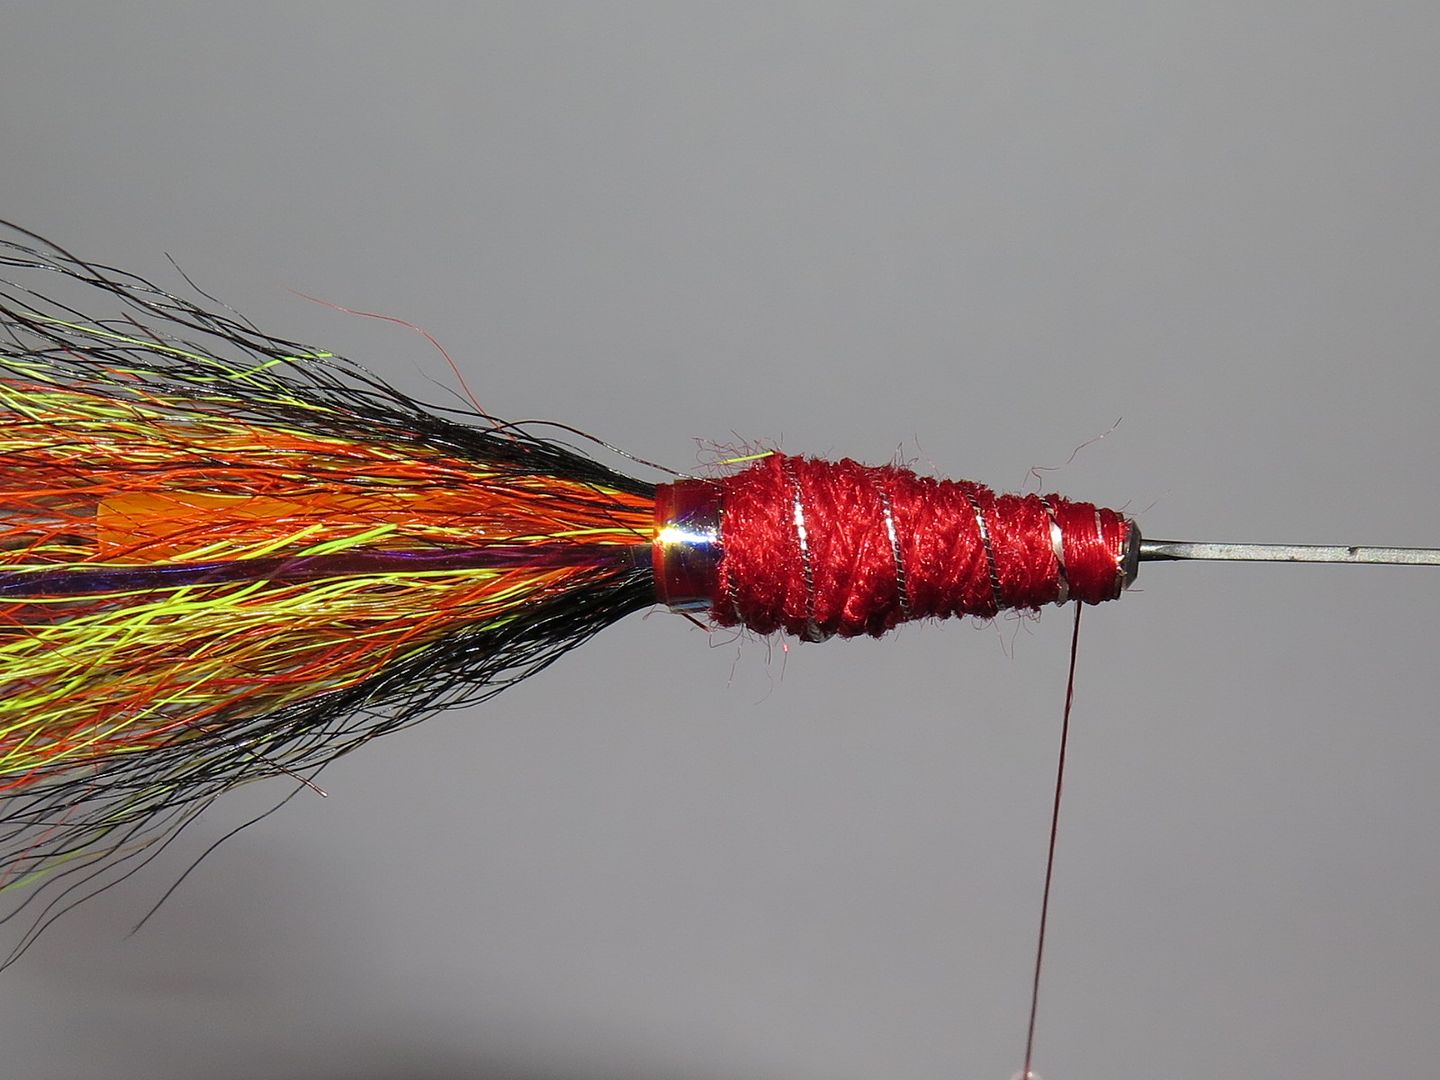
Step 14: Wind French Oval in open turns to form rib.
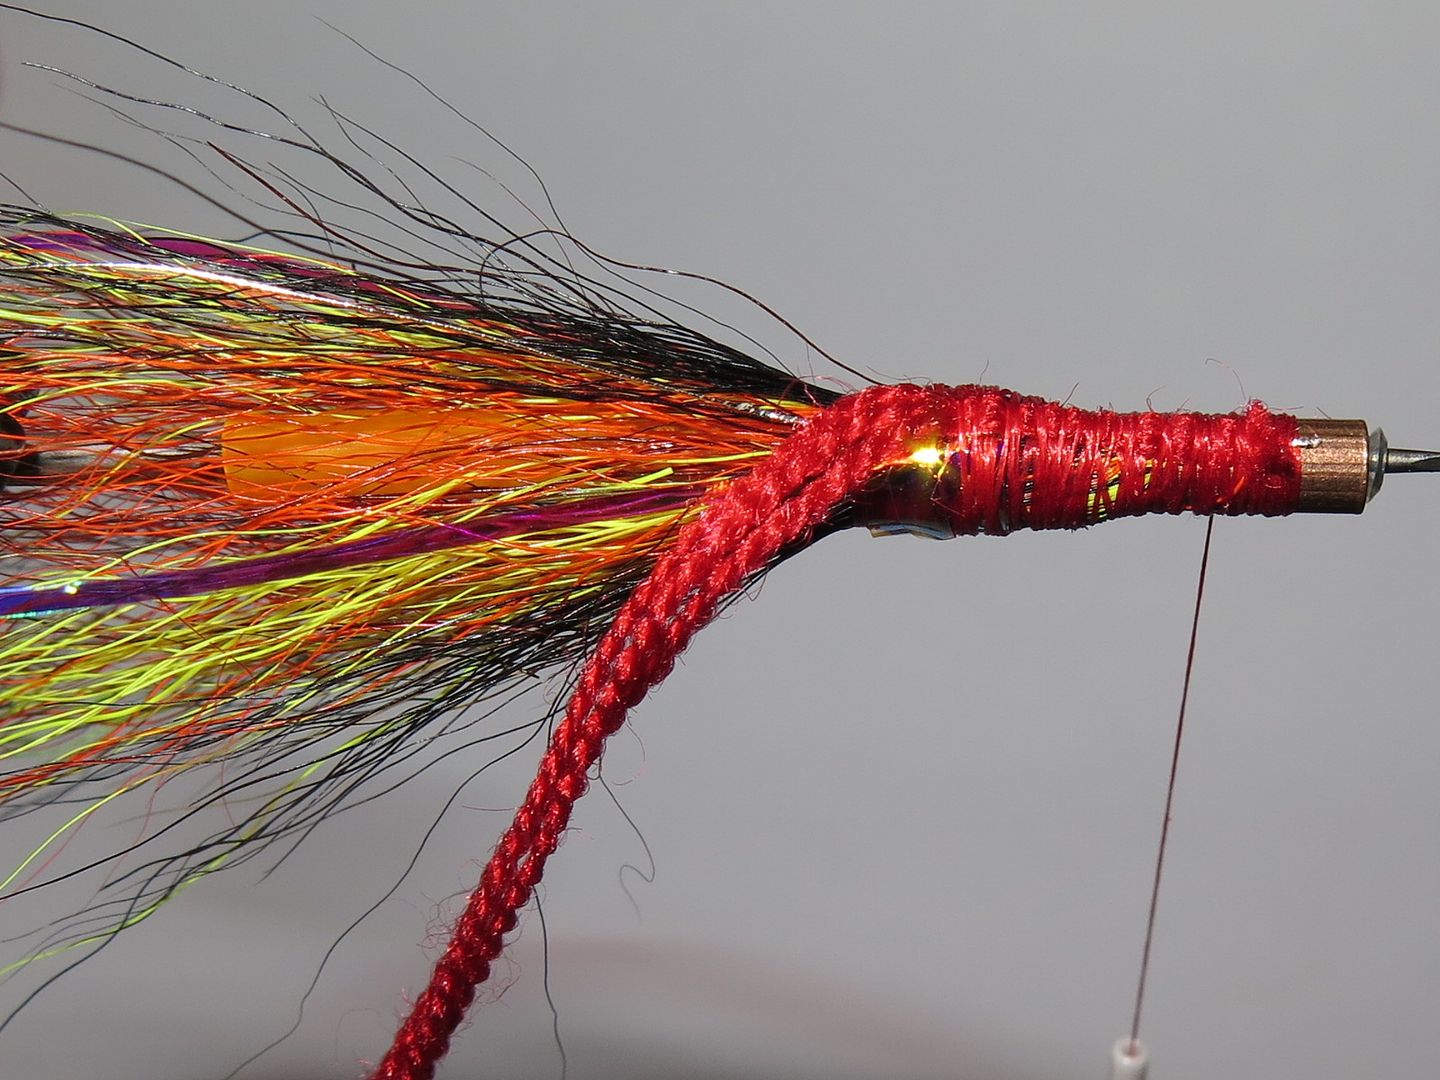
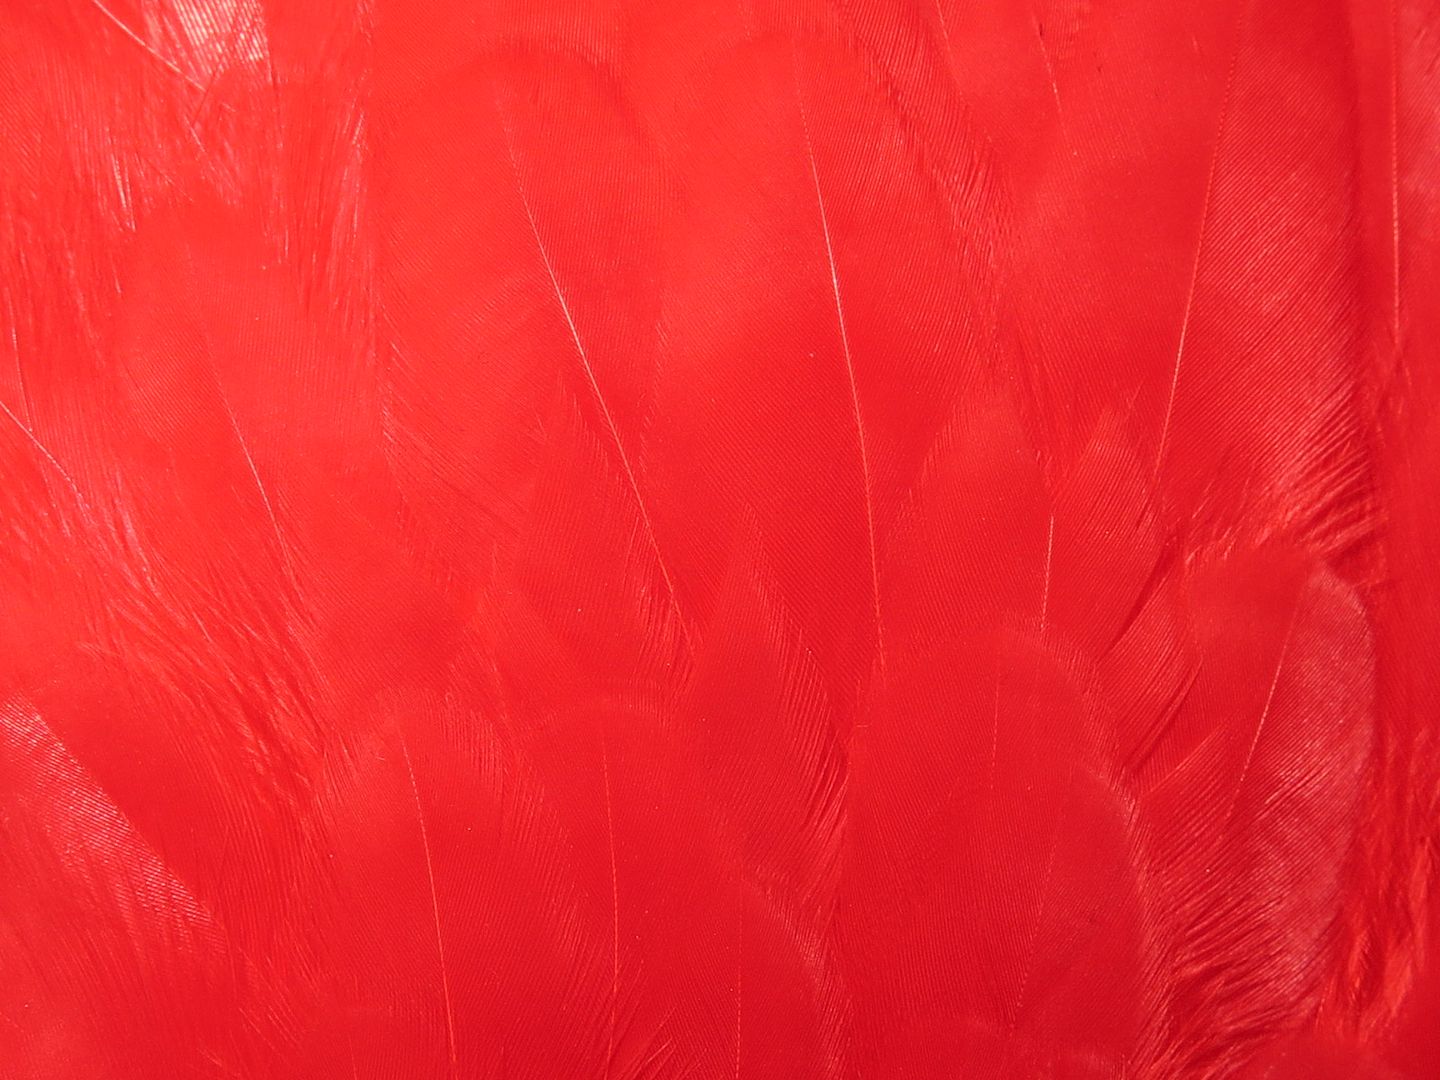
Step 15: Select your bestest most favourite redest hen saddle cape. Mine came from Chevron Hackles.
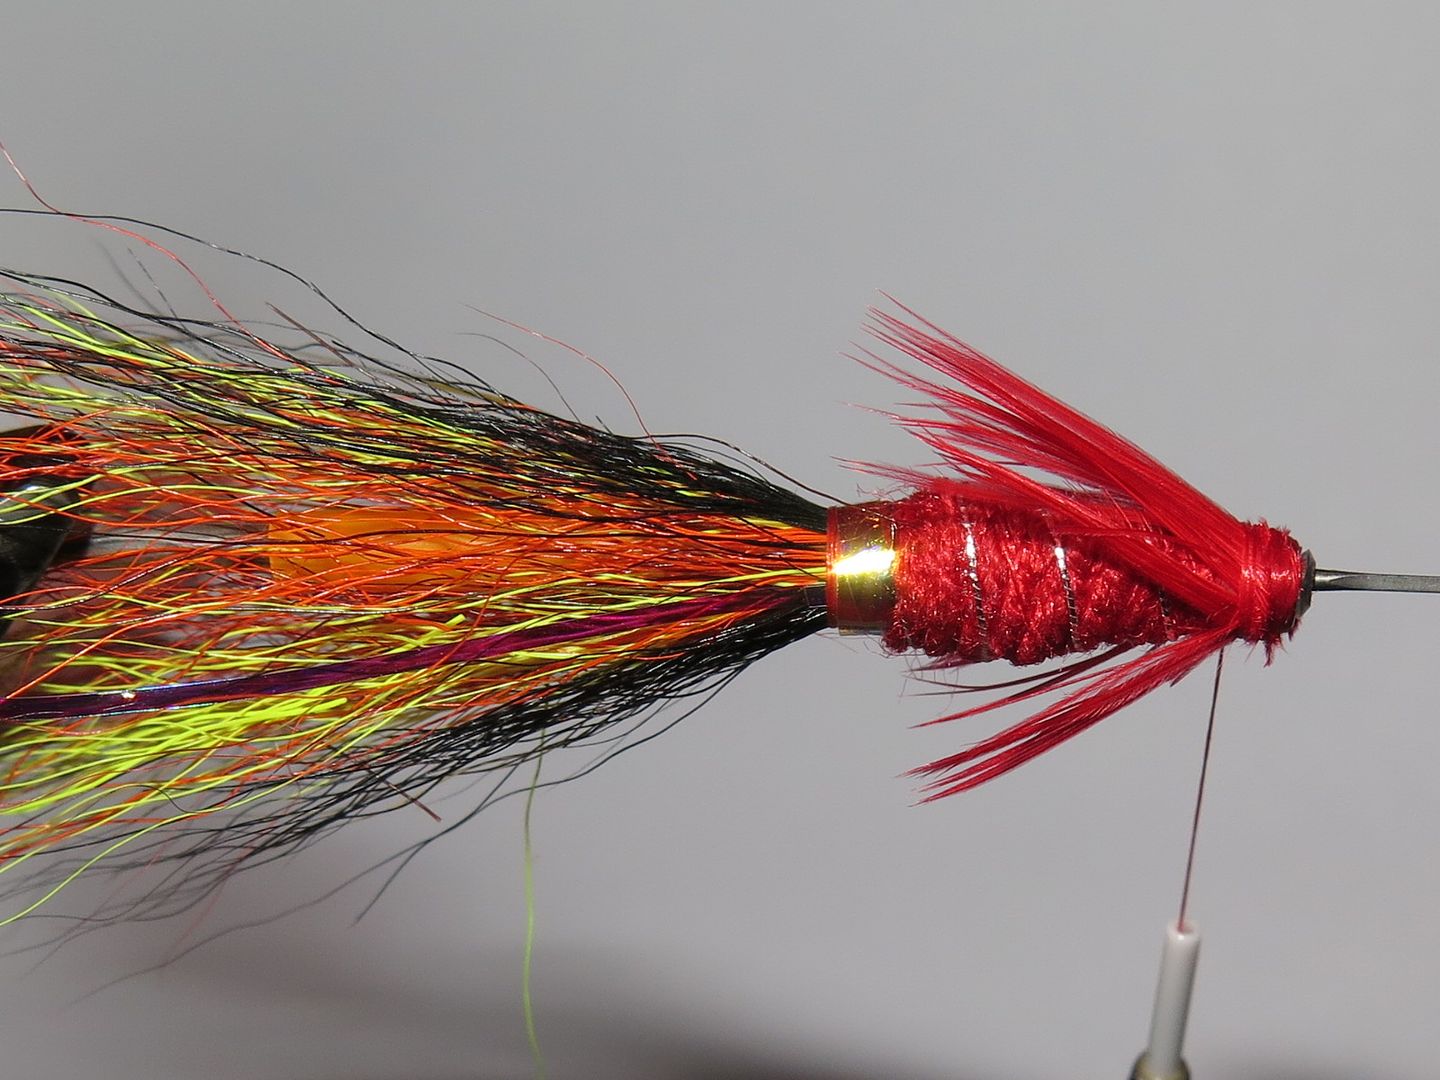
Step 16: Tie a hackle in by the tip.

Step 17: Wind for a couple of turns.
Step 18: Whip finish and varnish.
Step 19: Bang off a few arty JPEG's with your new camera which I confess I am still getting to grips with.
Tying Materials
Tube: Veniard copper Slipstream
Thread: Red
Tail: Blended orange, yellow and black bucktail fibres with a length of medium Opal Mirage overlaid down each side
Tag: Large Opal Mirage
Body: Red granny wool tied in carrot shaped profile
Rib: Medium French Oval
Hackle: Red dyed hen saddle
Tying Method
Step 1:Secure the tube with junction tube attached in the vice collet

Step 2: Attach red thread and wind in touching turns

Step 3: Cut a bunch of yellow dyed bucktail removing the underhair from near the base

Step 4: Repeat the process with red and black bucktail

Step 5: Blend the yellow and orange bucktail by rolling around in your fingers. It is important to ensure that the hairs are fully fixed. Tie in slim bunches around the tube.

Step 6: As you make the first couple of wraps of thread allow the bucktail to roll around the tube before securing. This ensures that the tail completely surrounds the tube evenly.

Step 7: You may in step 6 decide to include the black bucktail. Personally I prefer to tie it in separately and shorter than the orange and yellow. this also allows you to finely tune jut how dark you blend the tail of the pattern.

Step 8: Tie in Opal Mirage medium for that little bit of blingy thing.

Step 9: Trim the waste ends of the bucktail which should be done to shape to start to introduce the profile of the body.

Step 10: Tie in a length of large Opal Mirage and wind to form tag.

Step 11: Tie in a length of silver medium French Oval tinsel and wind back to tag.

Step 12: Tie in a length of red granny wool.

Step 13: Wind wool to carrot profile.

Step 14: Wind French Oval in open turns to form rib.

Step 15: Select your bestest most favourite redest hen saddle cape. Mine came from Chevron Hackles.

Step 16: Tie a hackle in by the tip.

Step 17: Wind for a couple of turns.

Step 18: Whip finish and varnish.

Step 19: Bang off a few arty JPEG's with your new camera which I confess I am still getting to grips with.


Comment