 Tweet
Tweet
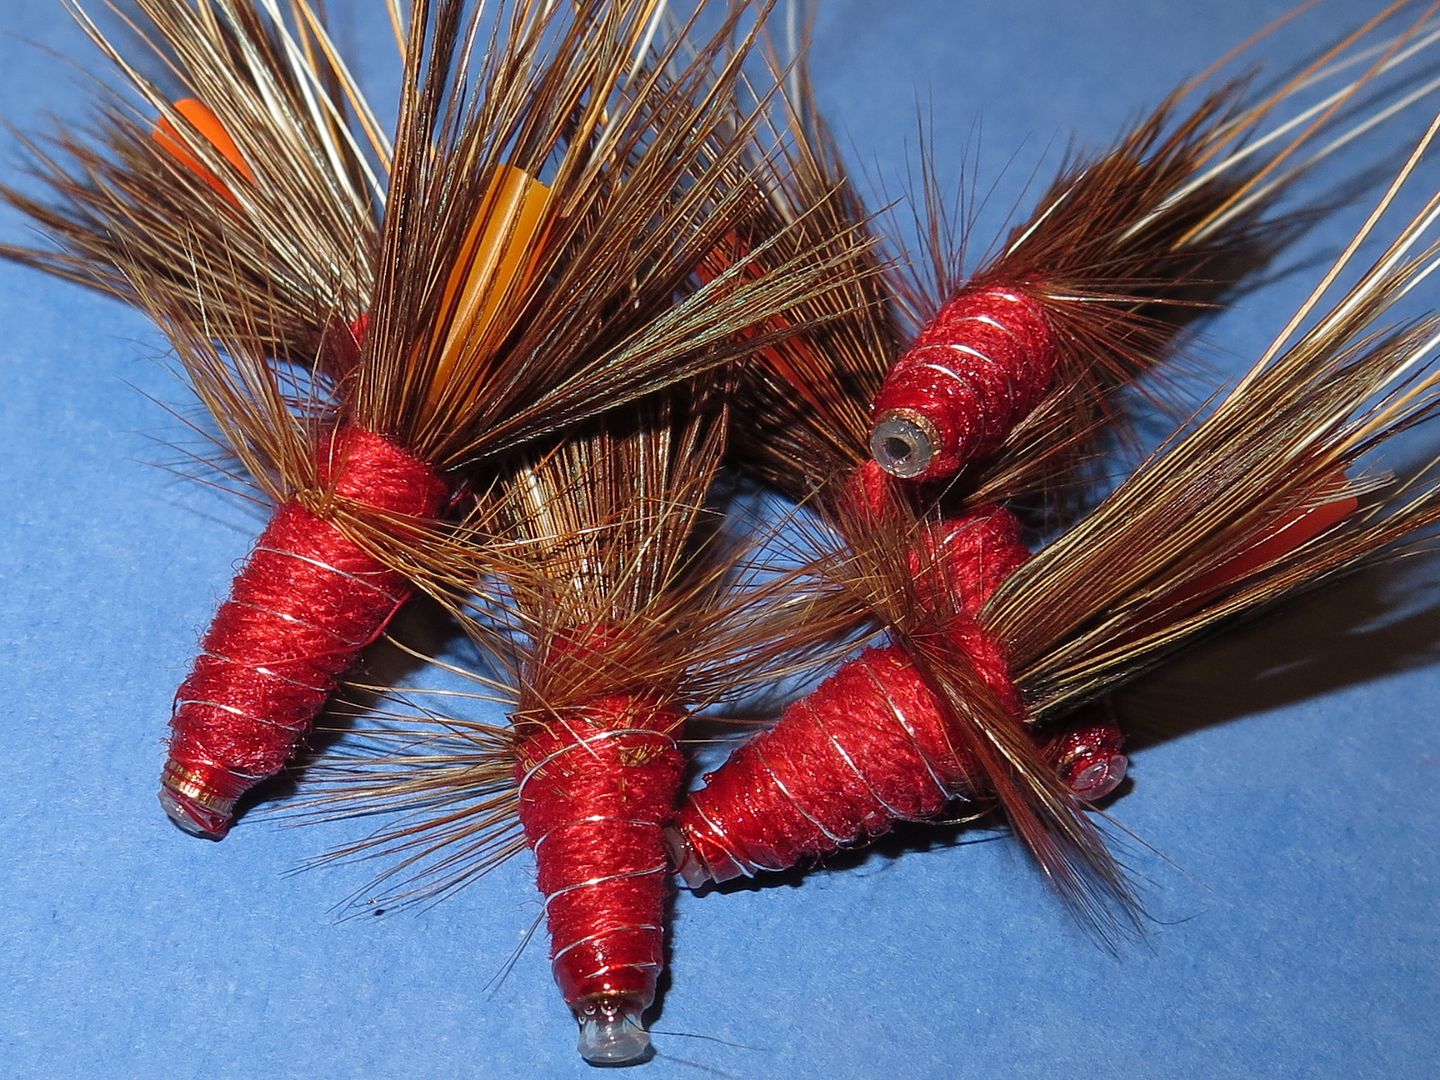
Although I demonstrate this pattern in red you may dress it in whatever colours suit you. Black or purple make excellent fishing flies and all you need to do is vary your thread and wool to suit. Similarly I show mine on a 3/4" copper tube they may be dressed on tubes of any length, doubles or trebles.
Tying Materials
Tube: Veniard Slipstream copper 3/4" long
Thread: Red
Feelers: 3 red game and 3 white cock hackle stalks
Rostrum: The original pattern utilised calf tail. I substitute with cock pheasant centre tail fibres
Body: 4 ply red dyed granny wool
Hackle: Brown cock
Rib: Medium silver wire
Tying Method
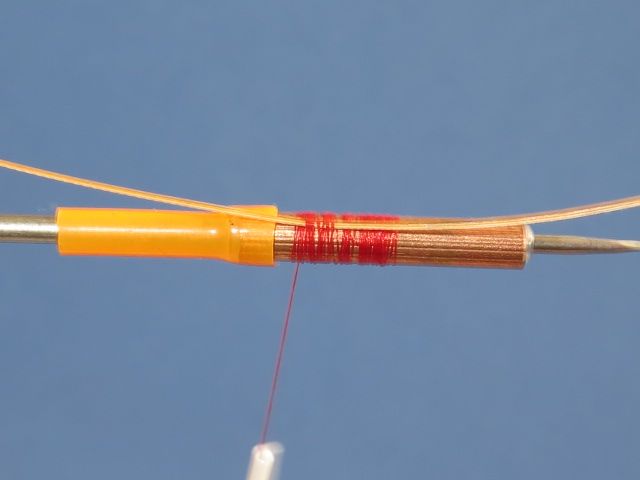
Step 1: Secure the tube FIRMLY onto a mandrel. There are a lot of turns of thread in this pattern and the wool and wire need to be wound extremely tightly to prevent them from unwinding. This creates a lot of tension and the tube can spin on the mandrel as you dress and unwind itself - NOT GOOD!!!!!!!
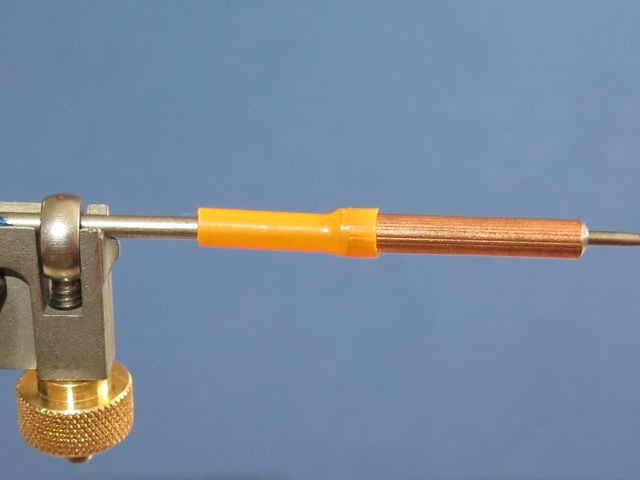
Step 2: Attach red tying thread and wind backwards.
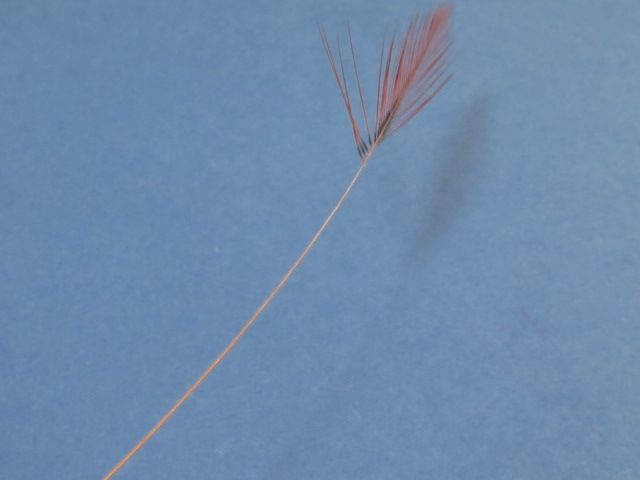
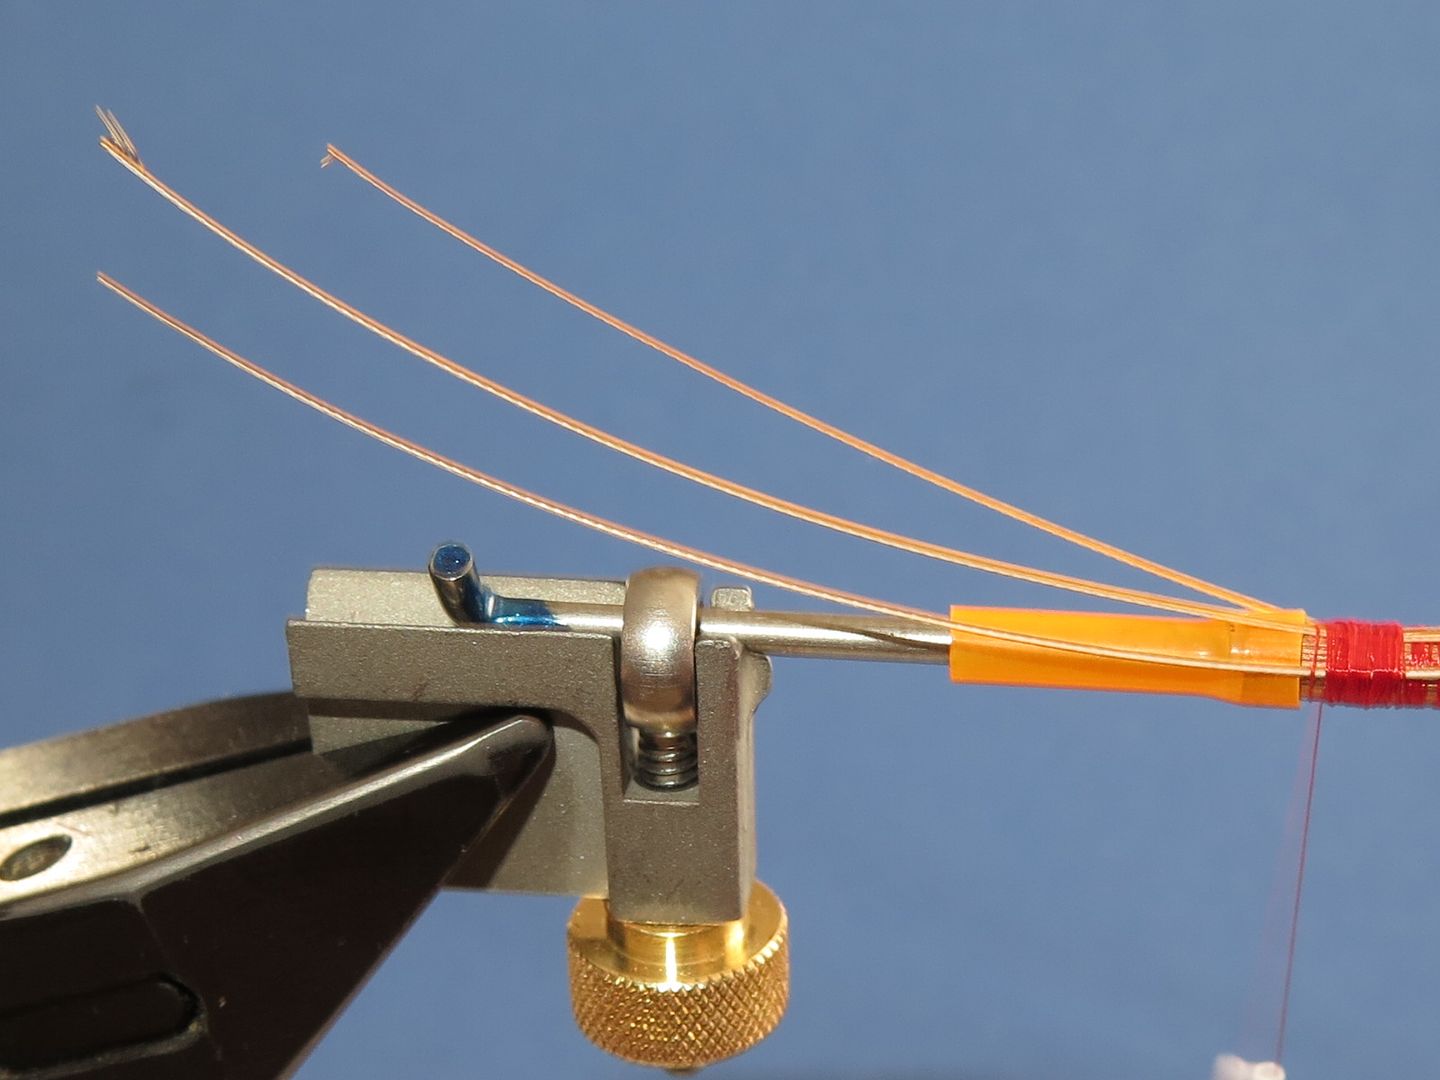
Step 3: Select 3 red game and 3 white cock hackles. Chinese or Indian low grade are perfectly acceptable. Here I show one red game
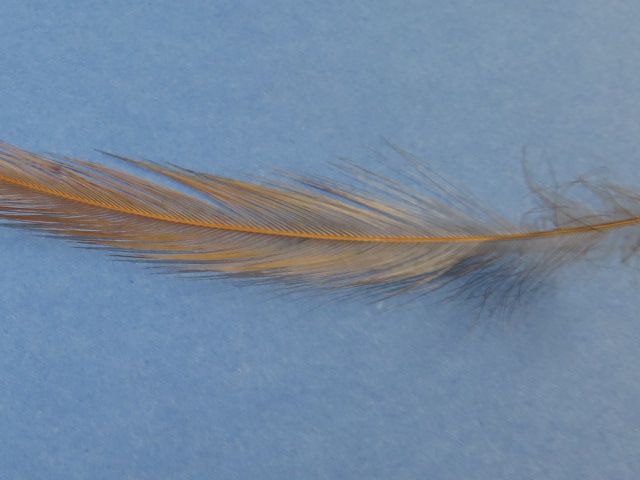
Step 4: Using finger and thumb gently strip the hackle fibres against their natural bias to remove them. Do not pull too hard or you risk snapping the stalk. Here I leave the fibres on the end for illustration and ease of handling.
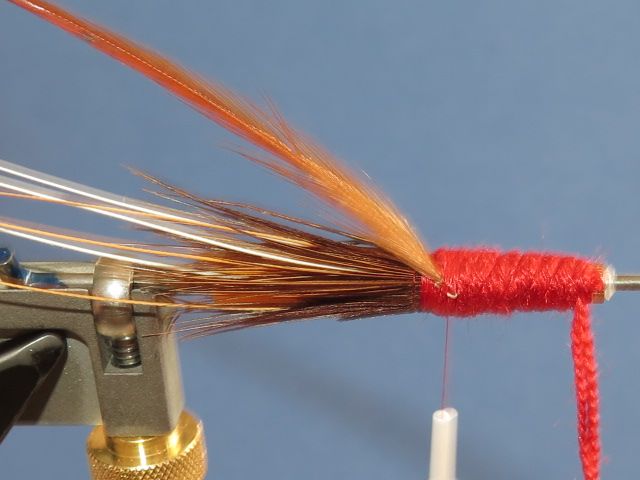
Step 5: Tie in the stalk along the tube. Do not be too concerned with how much of the tube you run along since the stalk ends help us for the foundation of the body taper.
Step 6: Repeat the process around the tube with the remaining 5 hackle stalks. I personally prefer to have the bias of the stalks all in the same plane. For one it looks tidier and for two I have looked closely at shrimps and the ones I have observed have the feelers curving the same way as each other. Ultimately its really your own choice.
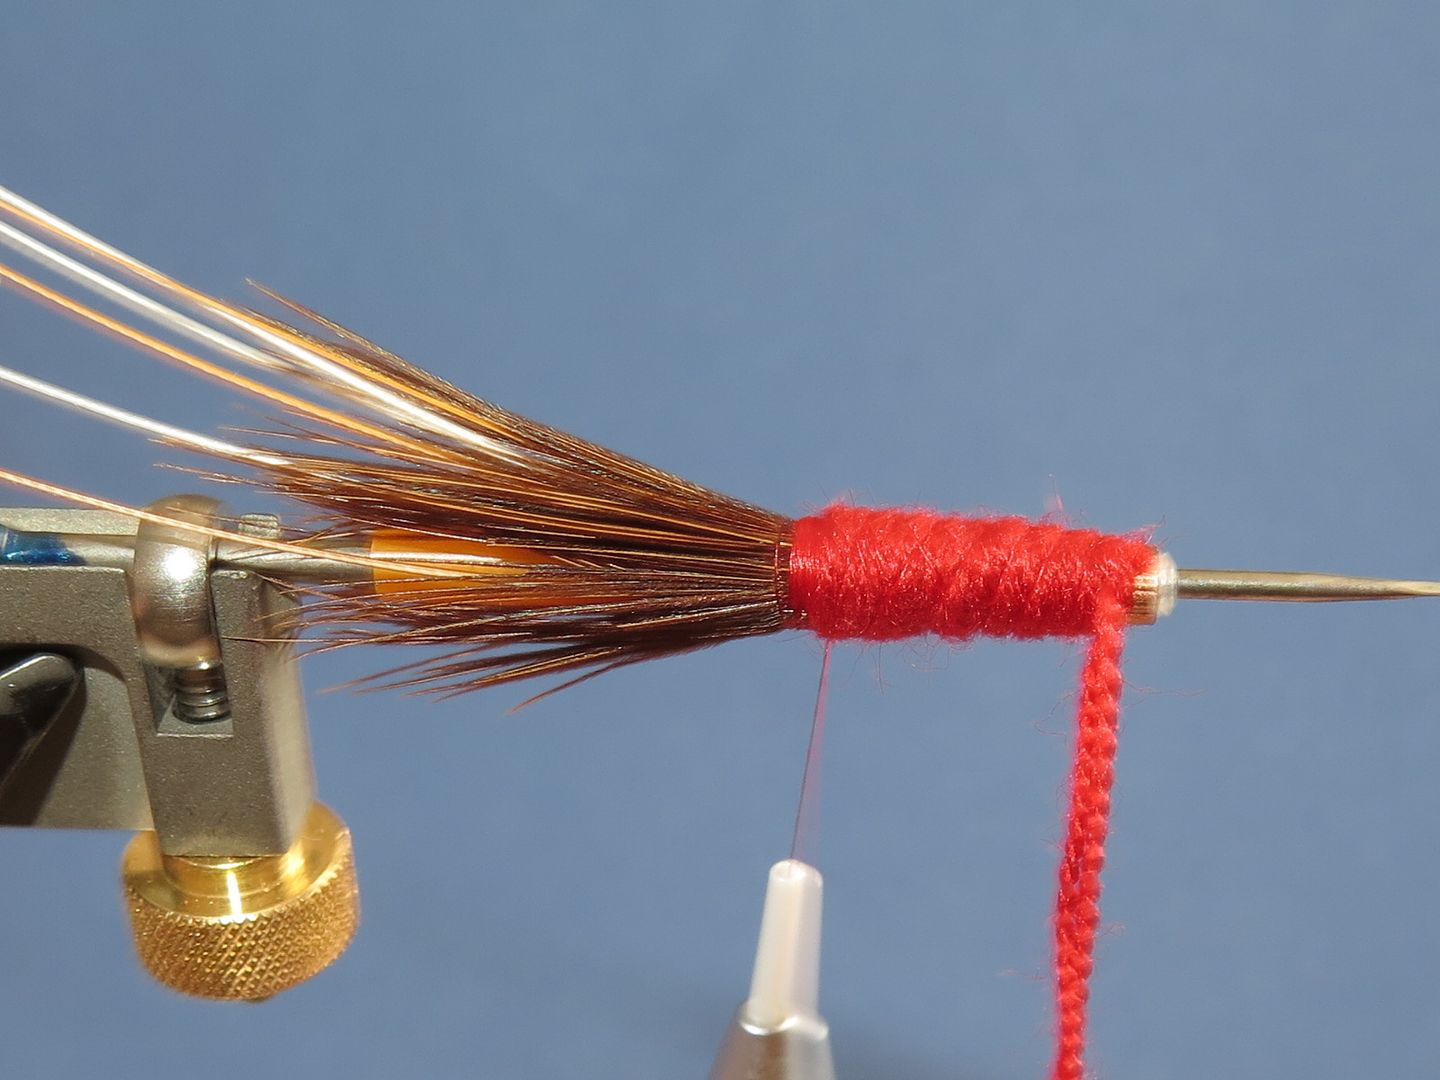
Step 7: With the feelers now tied in. Trim the waste ends at varying lengths along the tube. Bind down the ends tightly and you should already be able to produce the foundation of the taper effect for the body.
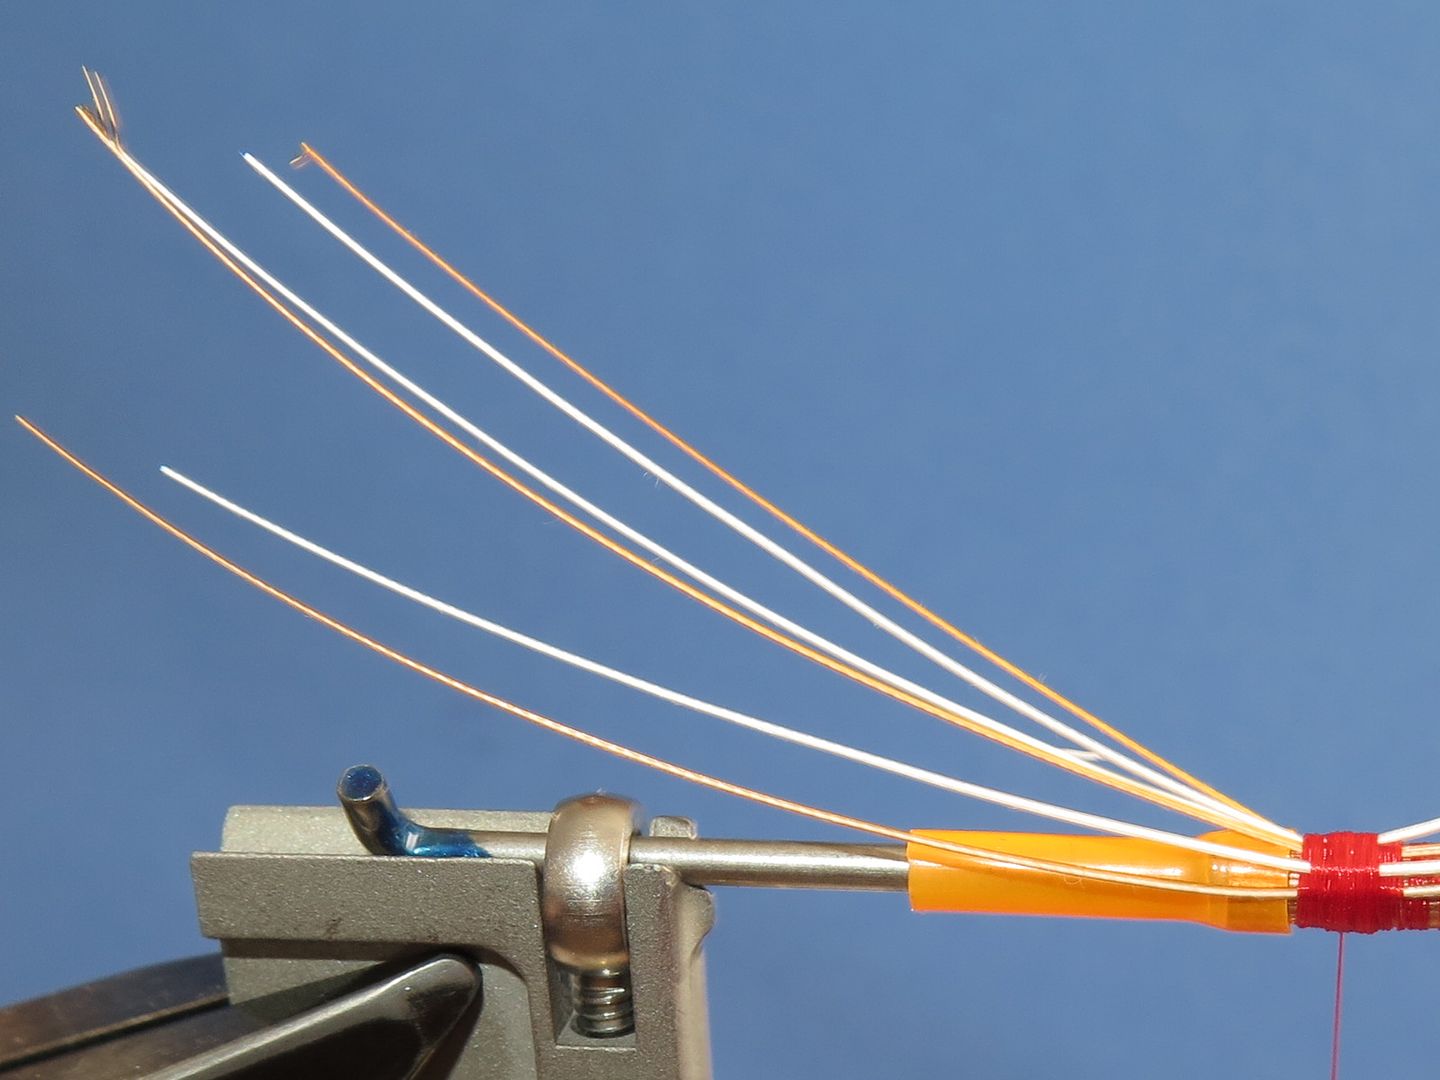
Step 8: Cut a generous bunch of cock pheasant centtre tail fibres and tie them in.
Step 9: Repeat this process around the tube to form the rostrum.
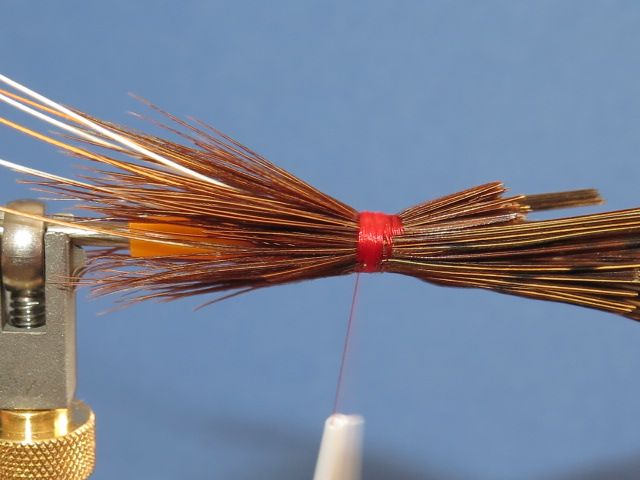
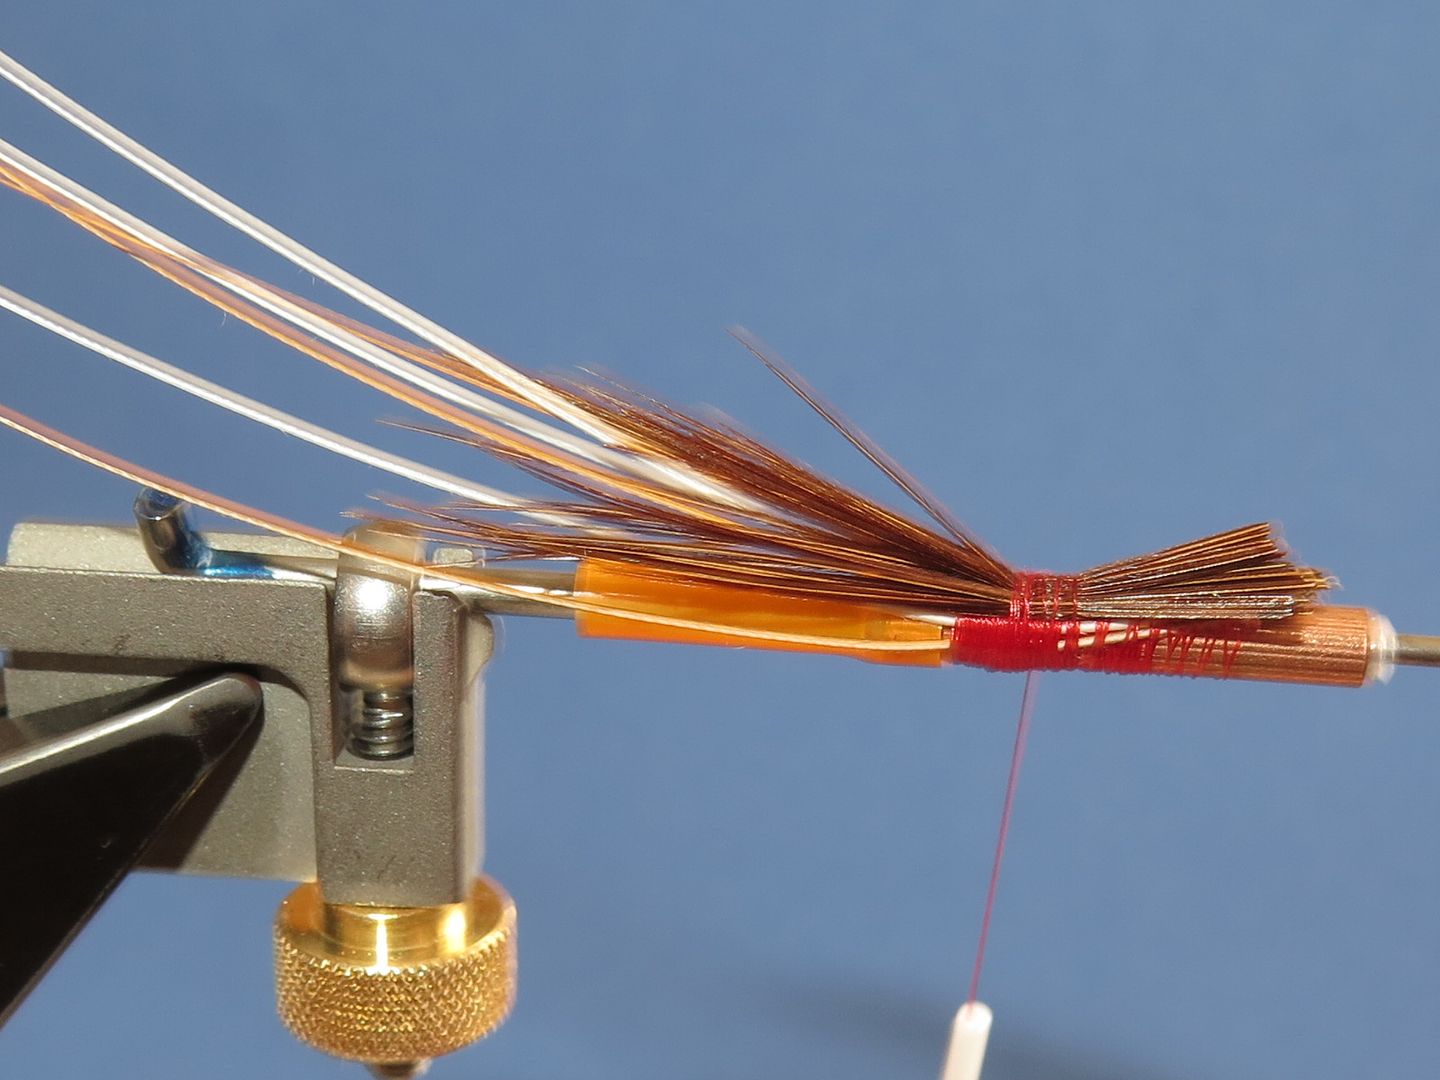
Step 10: By trimming the waste ends of the pheasant tails and binding down we can further enhance the profile foundation.
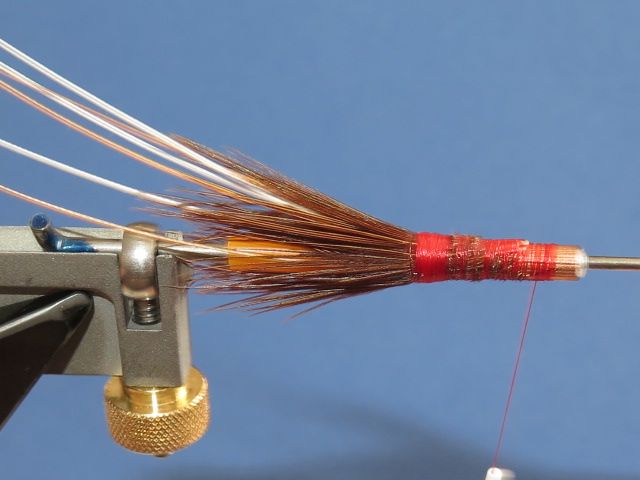
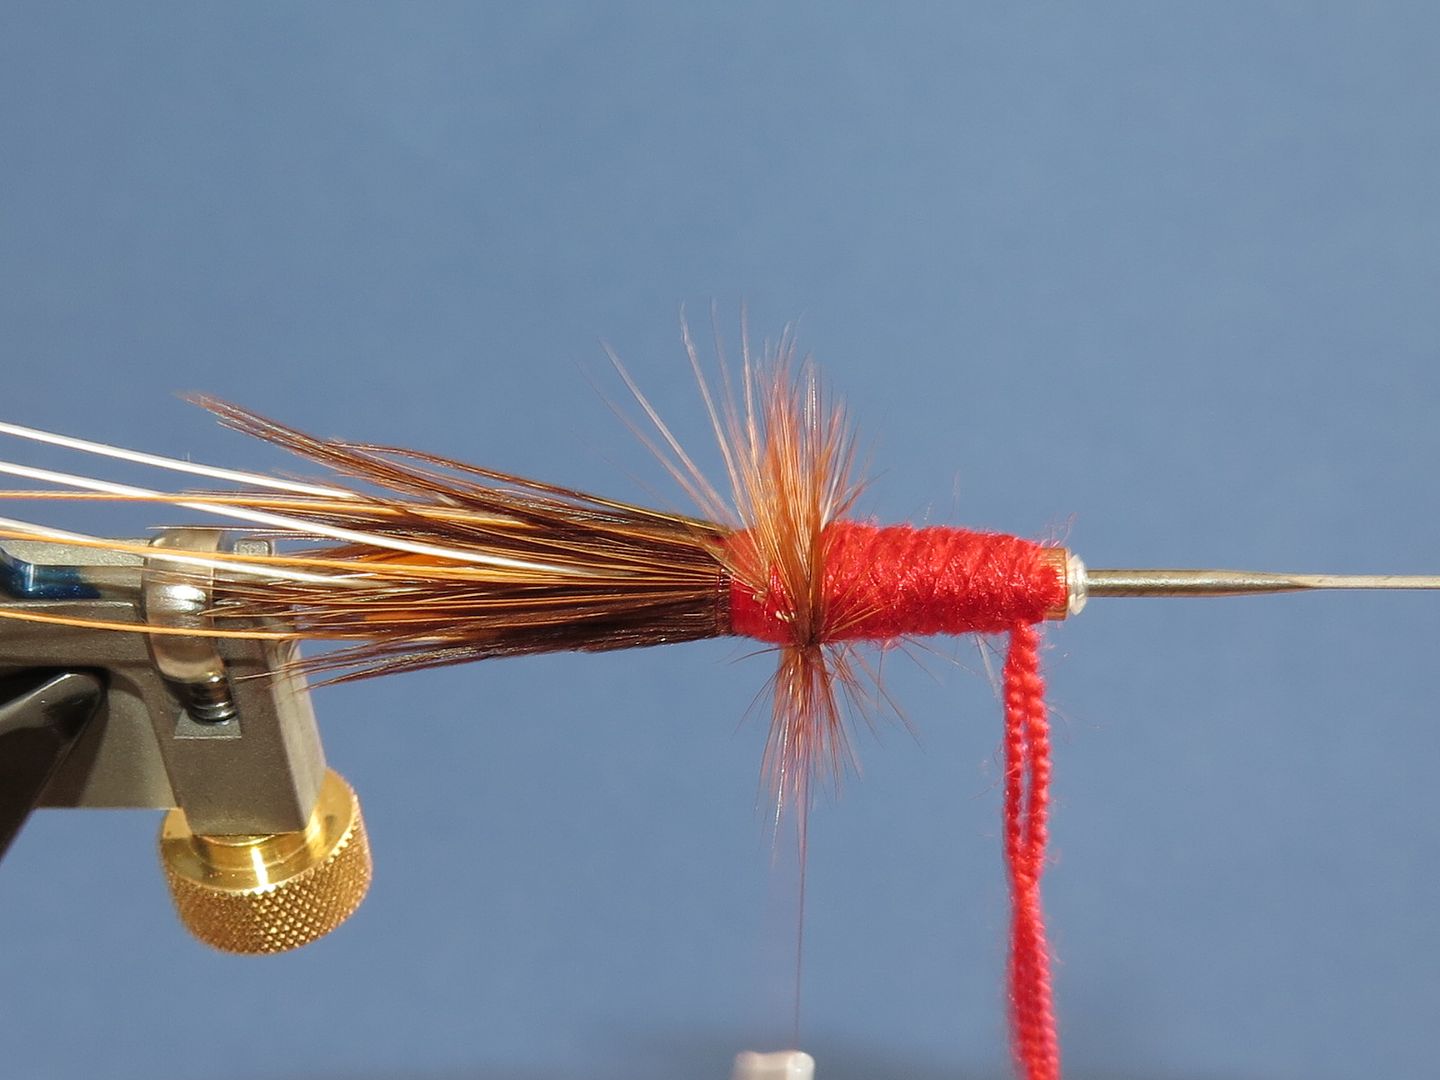
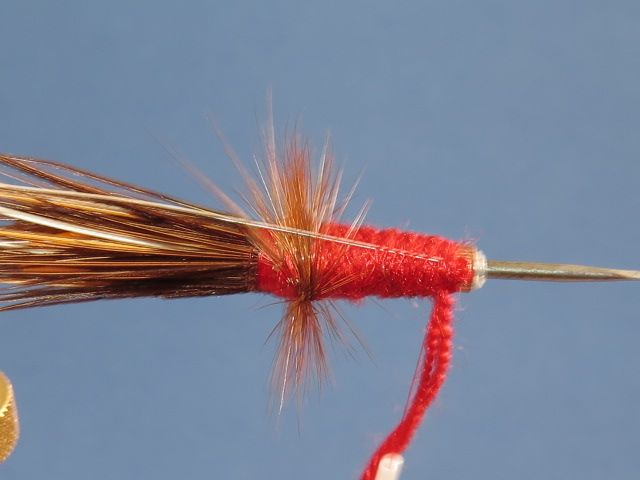
Step 11: Select a generous length of red dyed 4 ply granny wool.

Step 12: Fray the end of the wool and unwind 2 strands tying them in at the front end of teh tube.
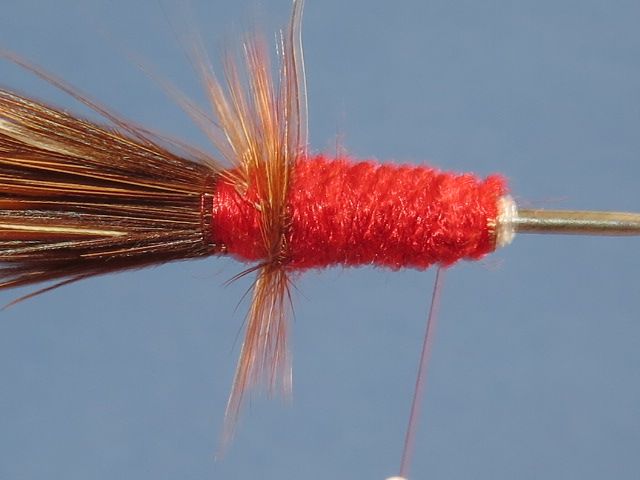
Step 13: Wind up and back down the tube once only. This will further enhance the taper and provide a base for the final profile.
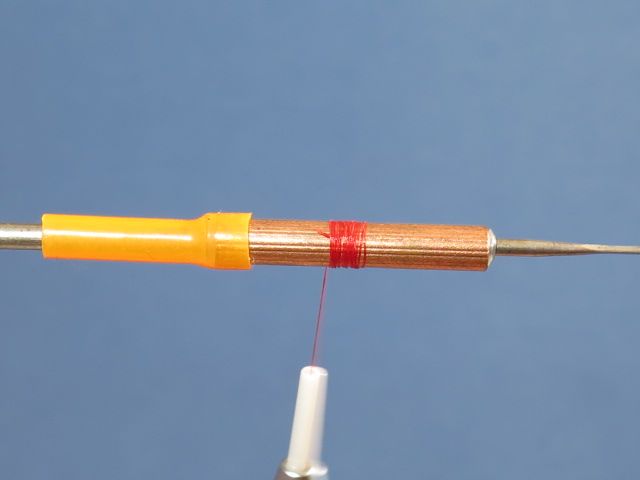
Step 14: Wind the thread up and down the body in tight open turns to bind down the wool. Terminate in vront of the rostrum.
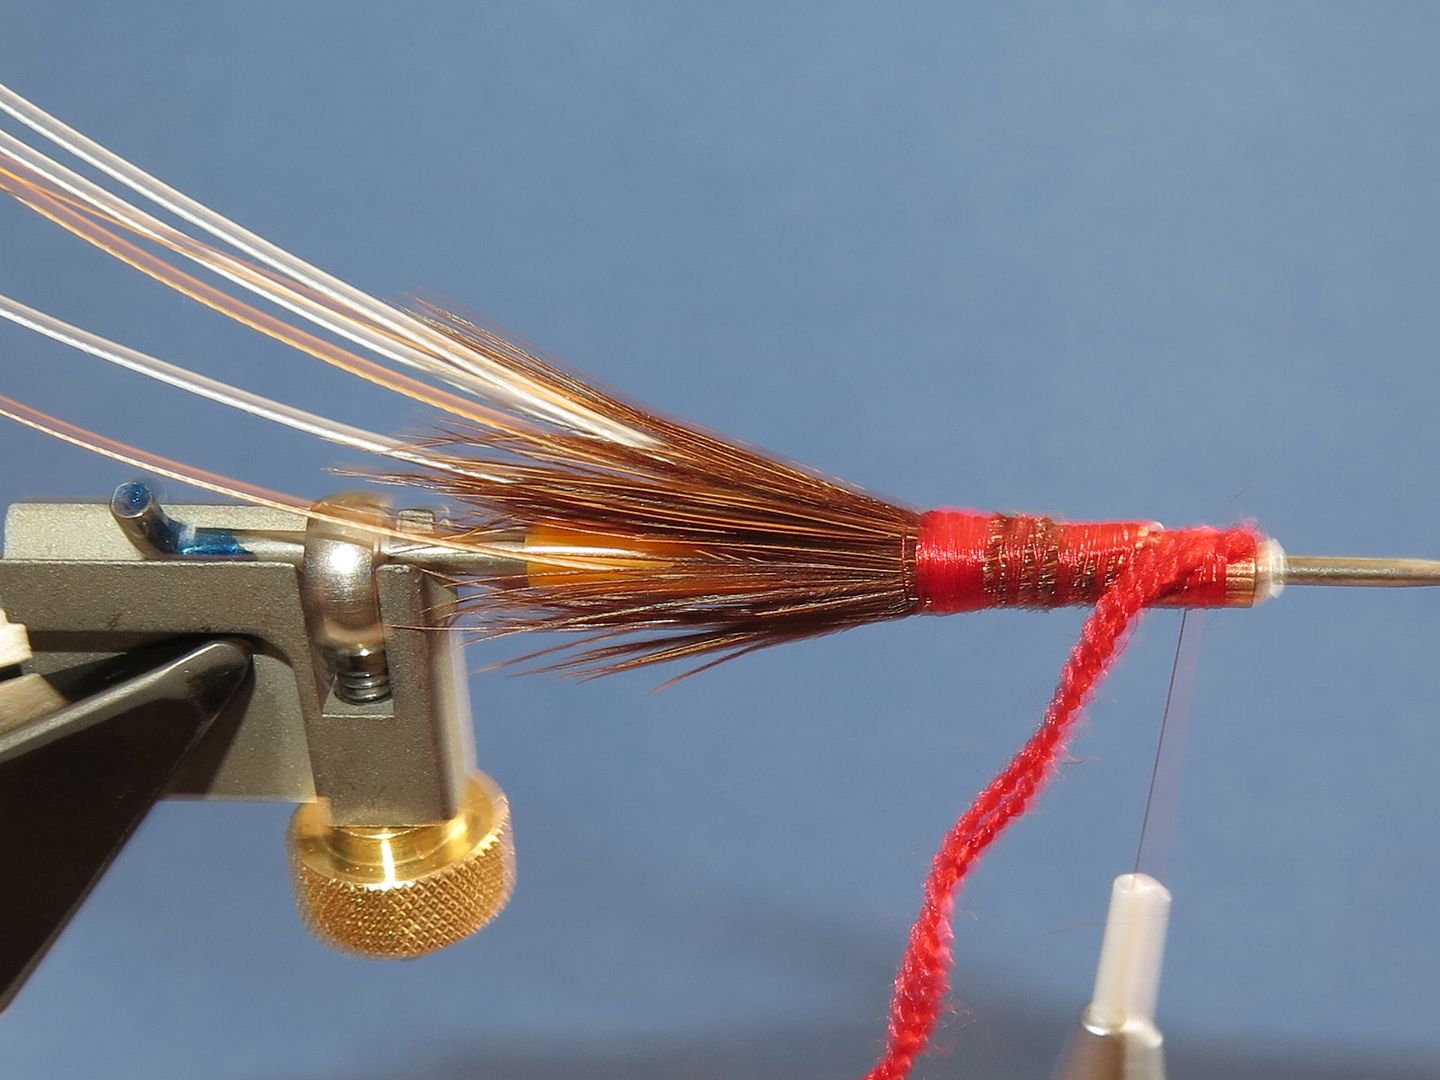
Step 15: Tie in a brown cock hackle.
Step 16: Wind the hackle for 4 or 5 turns.
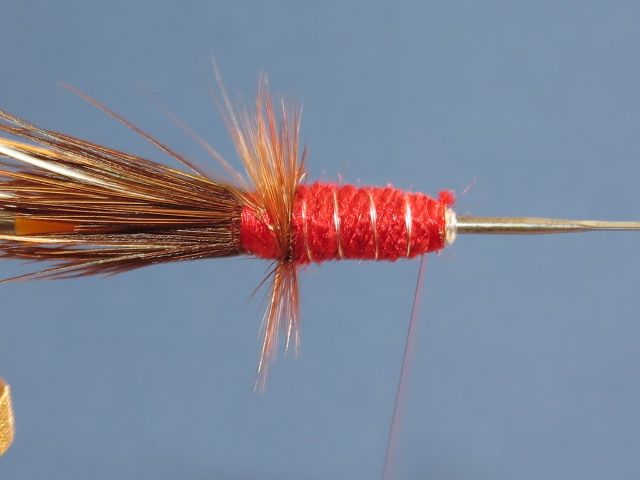
Step 17: Tie in a length of medium silver wire.
Step 18: GENTLY sweep the hackle fibres back with your hand and hold the silver wire. Wind the wool up to the cock hackle. How you now distriibute the wool as you wind it back down to the fron end of the tube will determine your final taper. There are of course numerous methods of achieving this taper used by thousands of different fly dressers. Tied in this fashion I have had salmon rip off the hackle stalks and demolish the hackle at varying points. The body however has never unwound itself.
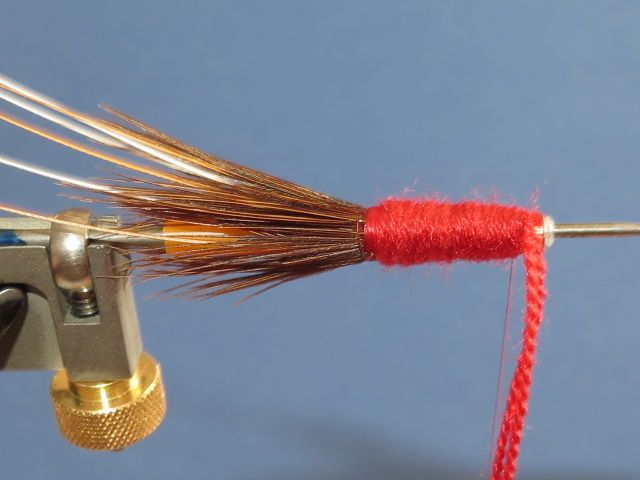
Step 19: Wind the wire in open turns to form the rib. I suggest that you check both sides of the tube ass you wind the wire. Yiu invariably find that one side may look even and regular whist on the opposite side the ribbing resembles the jam in one of my mothers roly poly cakes. The fish don't care but surely it is better to have a neat regular rib with parity on both sides?
Step 20: Whip finish and varnish. Lots and lots and lots of varnish. 3 or maybe 4 coats for the head. The wool has a tendency to soak up the varnish from the thread at the head. Drown the bugger in the stuff. You know it makes sense.
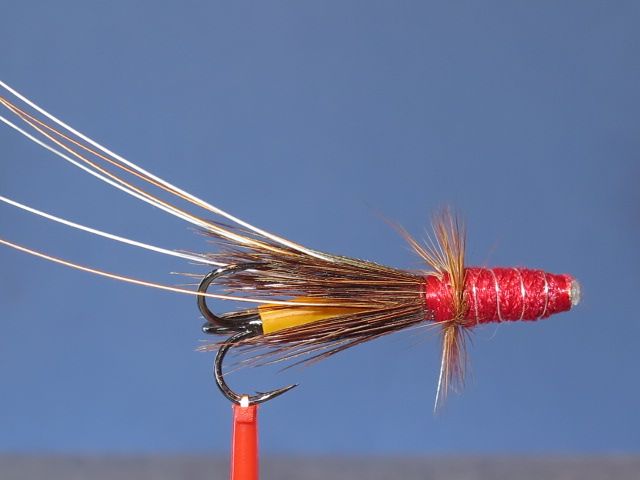
Step 21: Happy fishing to you all.
Tying Materials
Tube: Veniard Slipstream copper 3/4" long
Thread: Red
Feelers: 3 red game and 3 white cock hackle stalks
Rostrum: The original pattern utilised calf tail. I substitute with cock pheasant centre tail fibres
Body: 4 ply red dyed granny wool
Hackle: Brown cock
Rib: Medium silver wire
Tying Method
Step 1: Secure the tube FIRMLY onto a mandrel. There are a lot of turns of thread in this pattern and the wool and wire need to be wound extremely tightly to prevent them from unwinding. This creates a lot of tension and the tube can spin on the mandrel as you dress and unwind itself - NOT GOOD!!!!!!!

Step 2: Attach red tying thread and wind backwards.

Step 3: Select 3 red game and 3 white cock hackles. Chinese or Indian low grade are perfectly acceptable. Here I show one red game

Step 4: Using finger and thumb gently strip the hackle fibres against their natural bias to remove them. Do not pull too hard or you risk snapping the stalk. Here I leave the fibres on the end for illustration and ease of handling.

Step 5: Tie in the stalk along the tube. Do not be too concerned with how much of the tube you run along since the stalk ends help us for the foundation of the body taper.

Step 6: Repeat the process around the tube with the remaining 5 hackle stalks. I personally prefer to have the bias of the stalks all in the same plane. For one it looks tidier and for two I have looked closely at shrimps and the ones I have observed have the feelers curving the same way as each other. Ultimately its really your own choice.

Step 7: With the feelers now tied in. Trim the waste ends at varying lengths along the tube. Bind down the ends tightly and you should already be able to produce the foundation of the taper effect for the body.

Step 8: Cut a generous bunch of cock pheasant centtre tail fibres and tie them in.

Step 9: Repeat this process around the tube to form the rostrum.

Step 10: By trimming the waste ends of the pheasant tails and binding down we can further enhance the profile foundation.

Step 11: Select a generous length of red dyed 4 ply granny wool.

Step 12: Fray the end of the wool and unwind 2 strands tying them in at the front end of teh tube.

Step 13: Wind up and back down the tube once only. This will further enhance the taper and provide a base for the final profile.

Step 14: Wind the thread up and down the body in tight open turns to bind down the wool. Terminate in vront of the rostrum.

Step 15: Tie in a brown cock hackle.

Step 16: Wind the hackle for 4 or 5 turns.

Step 17: Tie in a length of medium silver wire.

Step 18: GENTLY sweep the hackle fibres back with your hand and hold the silver wire. Wind the wool up to the cock hackle. How you now distriibute the wool as you wind it back down to the fron end of the tube will determine your final taper. There are of course numerous methods of achieving this taper used by thousands of different fly dressers. Tied in this fashion I have had salmon rip off the hackle stalks and demolish the hackle at varying points. The body however has never unwound itself.

Step 19: Wind the wire in open turns to form the rib. I suggest that you check both sides of the tube ass you wind the wire. Yiu invariably find that one side may look even and regular whist on the opposite side the ribbing resembles the jam in one of my mothers roly poly cakes. The fish don't care but surely it is better to have a neat regular rib with parity on both sides?

Step 20: Whip finish and varnish. Lots and lots and lots of varnish. 3 or maybe 4 coats for the head. The wool has a tendency to soak up the varnish from the thread at the head. Drown the bugger in the stuff. You know it makes sense.

Step 21: Happy fishing to you all.


Comment